![]()
Welcome to the third in a four-part series on getting better live sound, co-presented by Performer Magazine and Yamaha.
READ PART ONE: WHAT TO LOOK FOR IN A LIVE MIXER
READ PART TWO: HOW TO SET UP PA SPEAKERS
SKIP TO PART FOUR: PRO TIPS FOR LIVE MIXING
Main outputs for a live mixer
In this installment, we’ll take a closer look at routing options when it comes to your new live mixer. Yamaha has been kind enough to loan us one of the compact mixers from their wonderfully affordable XU series of analog mixers, so that we can show how various routing applications work. There are three primary ways that most bands will be using their mixers to route audio signals: sending sound to their main PA speakers, sending sound to on-stage monitors or in-ear monitors, and routing signals to external effects devices (and then back into the mix). Let’s explore how each of these would work on a typical mixer. Keep in mind this entry is designed for beginners, so if you’re already running FOH for a large-scale touring band or venue, this won’t be for you.
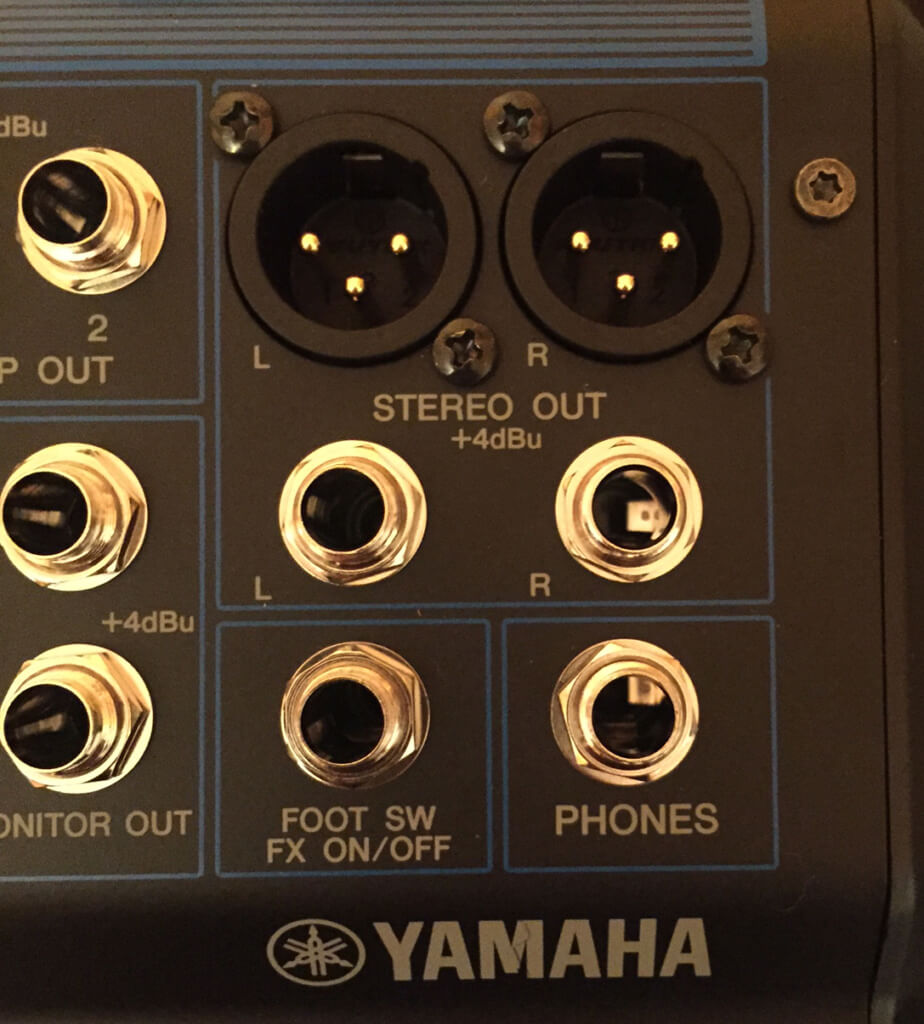
MAIN OUTPUT
The most common application for a live mixer is part of a PA system. So, it only makes sense that traditionally, what most bands will be doing with their new mixer is outputting sound to their PA speakers, either for rehearsals or stage use. This is an easy step, as most compact mixers have readily identifiable main outputs, most of which will be setup to work with balanced XLR cables. So, simply take the left and right outputs from your mixer’s main outputs, and run an XLR cable to each of your left and right channel PA speakers on stage or in your practice space. That wasn’t hard, was it?
AUX SENDS – WHAT ARE THEY?
OK, so getting sound to your main speakers is easy. But what else can your mixer do? Well, most mixers, both large and small, are equipped with routing options called “Aux Sends.” In its simplest form, this functionality allows you to send a signal to an auxiliary location (the “aux” part). Now, why would you want to do this? There are a number of incredibly practical applications where it makes sense to take sound coming into your mixer, and send it out somewhere else, either for additional processing, effects, or simply to feed a mix to stage monitors, in-ear monitors or another monitoring source.
Aux Sends
Take a look at your mixer’s channel strips and output section. In the channel strip, you’ll likely notice some “aux send” level controls, which allow you to change the levels of that channel being fed to a particular aux send output. Your mixer may have many different aux send options, allowing you to simultaneously send signals out for external processing and monitor mixes. Conversely, your mixer may only have a few aux send options, so keep that in mind when shopping for a new compact mixer.
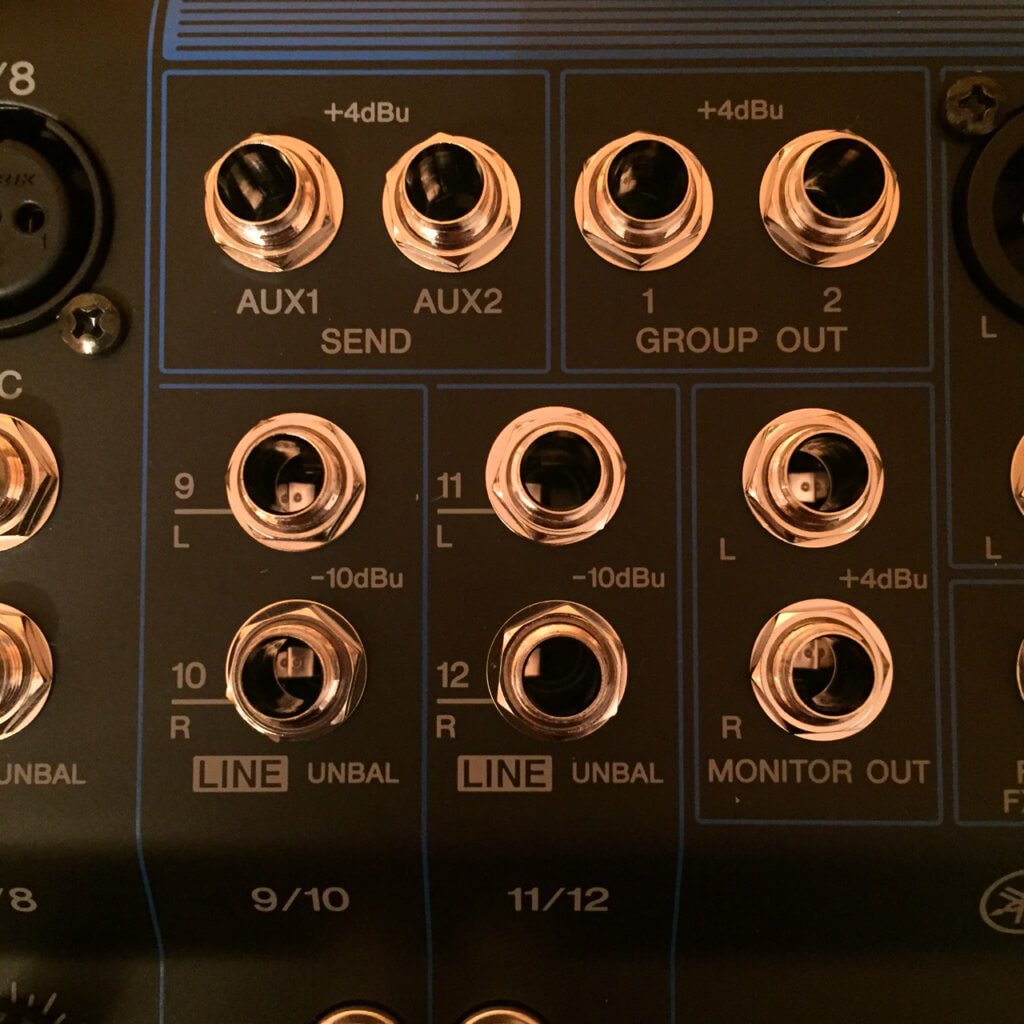
Now, take a look at your output section. Your mixer will likely have corresponding aux send outputs for each level control you see in the channel strip. On our Yamaha unit, for example, we see a level control for “Aux1” and a corresponding output near our main output for “Aux1”. It’s always a good idea to test things out in a tactile way, so you can get a real hands-on feel for what Aux1 does by simply attaching a 1/4” cable to an external monitoring device, and by turning the Aux1 knob to increase or decrease levels. Simple, right?
[insert_ad]
ROUTING STAGE MONITORS
We know what our aux options are. Now let’s use them in a real-world situation. Let’s say you’re setting up your own stage gig. Perhaps you’ve rented a hall and want to make sure the sound is just right. You’ll set up your main PA speakers like normal, but now let’s get the aux sends in the mix (no pun intended). Most PA speakers, like the Yamaha DBR12’s we’ve been using, can also be used as floor wedges.
So, if your vocalist needs to hear themselves better during the gig, why not use your Aux1 option to send a version of your mix to a floor wedge? What’s great about this option is you can actually turn up their vocal channel to accentuate the vocals in their auxiliary monitor mix without turning up the vocals in your main mix. So, your singer can hear themselves clearly above everything else, but your audience won’t be blasted with an out-of-proportion amount of vocals coming from your mains.
ROUTING IN-EAR MONITORS
The same concept applies to in-ear monitors. If you’re setting up your own small compact mixer for a gig, routing a mix to a set of in-ears will work the same way. Take your Aux1 output and route that to the input of your wireless transmitter (assuming you’re using a wireless personal monitoring system, of course), or to a headphone amp for wired usage. In either case, again you’ll have the ability to send a specialized “monitor mix” to any musician using the in-ear setup, which can differ from the main mix being sent to the PA speakers on stage.
As you can see, getting a handle on those aux options can unlock the potential lurking in your band’s new mixer.
RETURN TO SENDER
One of the more creative ways to use sends it to route audio coming into the mixer out to external processing units or effects. Get creative here. Let’s take an acoustic guitar, for example, and use the panning knob to set it hard left in our main mix. Now, let’s take that channel and use our Aux1 options to send its signal to a rack-mount phaser (or any device you choose), and then return that signal into an open channel on the mixer. Pan that channel hard right in the mix, and then blend the two to taste in order to create a truly spaced out stereo effect. Dial up or down each of the dry or wet signals to add interesting texture to an instrument. Or take the dry signal out of the mix completely if you like. This is where we encourage experimentation.
Aux sends can be great for applying reverb to all of your backup vocals in one fell swoop, or for doing cool things like sending audio out to a delay unit and back into an unused channel. Try new things. Make the most out of the options your mixer has, because you might be surprised by some of the happy accidents you come up with that can really add a new dimension to your stage sound.
Depending on your mixer, you may have dedicated “returns,” as well, which will enable you to bring processed audio and fx back into the mixer. Our advice, as always, is to consult the manual last. Get hands-on, get tactile and learn by doing!
PRE-FADER/POST-FADER: THE KEY DIFFERENCE
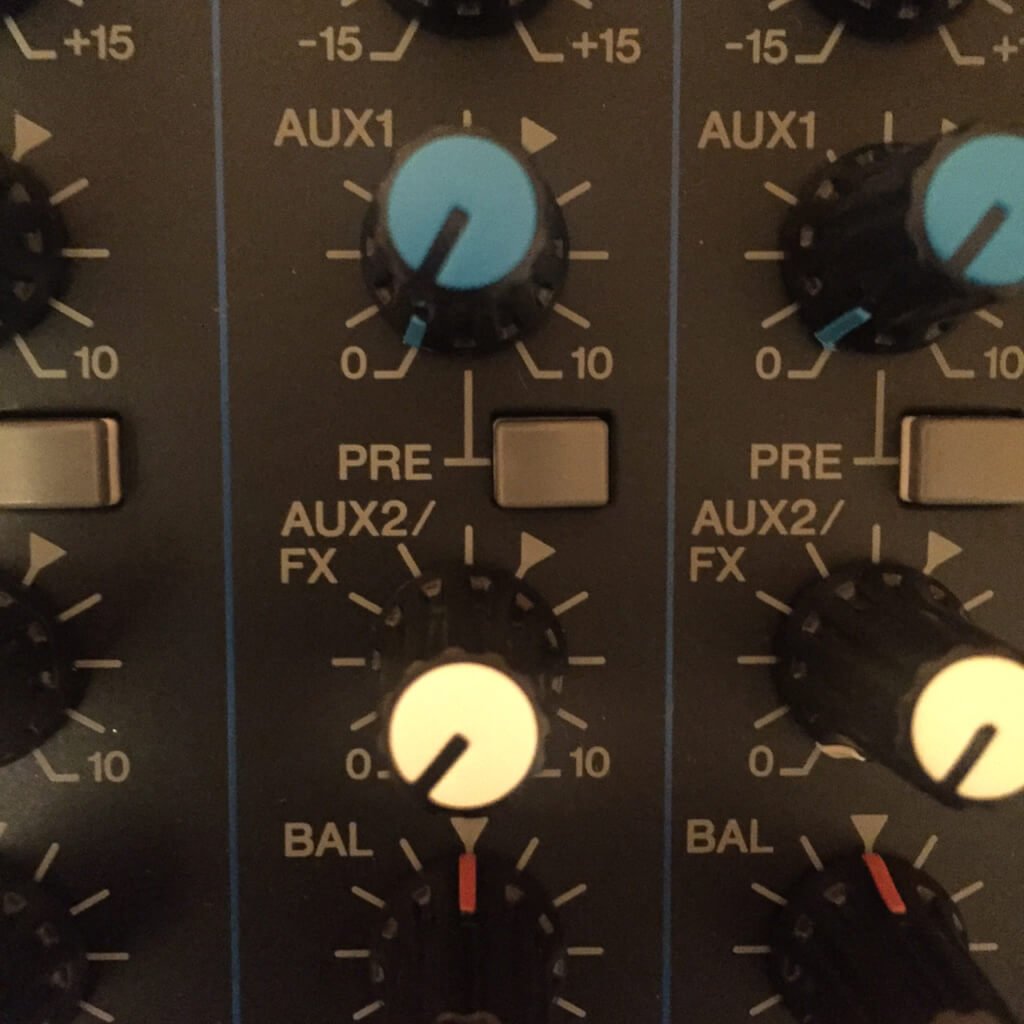
One thing we haven’t touched upon yet is a little button you may notice in your channel strip labeled “Pre.” Now, don’t get confused here. Sometimes bands who’re first setting up their mixers aren’t sure of what this button does, mistakenly thinking it turns on the preamps for their mics. This is not the case. If you see something labeled “Pre” near your Aux1 or Aux2 controls in the channel strip, this actually lets you set whether the aux send is “pre-fader” or not.
Aux Send and the “Pre-Fader” option
Basically, when engaged (and usually we find that aux sends are pre-fader by default), the “pre” setting will not be affected by your main faders at the bottom of the board. So, go ahead and turn up the guitar in the main mix, it won’t affect what’s going on in your aux send setup. Conversely, if you disengage this button, the signal will now be “post-fader,” and any adjustments you make to the main fader on that channel will now also affect your aux send signal for that channel.
CLOSING THOUGHTS
We hope this installment gets you on your way to sending sound into, out of, and back into your new mixer. Until next time, be sure to check out the entire range of Yamaha live sound products here and follow them on Facebook and Twitter.