![]()
Welcome to the first in a four-part series on getting better live sound, co-presented by Performer Magazine and Yamaha. In this installment, we’ll take a closer look at what to look for when shopping for a compact mixer, including what they are, who they’re for, some of their basic functionality, and how they can serve as the central hub for your live sound. Yamaha has been kind enough to loan us one of the compact mixers from their wonderfully affordable XU series of analog mixers, so that we can highlight how it works, and define some commonalities it shares with other compact units.
WHAT IS A COMPACT MIXER
Put simply, a mixer accepts a combination of sound sources that are input into it, and can then output those sources after the audio sources have been adjusted. In plain English, it allows you to route all of your vocals, instruments, effects and auxiliary sound sources into one unit, control their levels and tonal characteristics, and then spit out that sound in a variety of ways (through PA speakers, headphones, into a computer for recording, etc.) Most compact mixers feature many of the same elements, which we’ll explore below, and once you learn how one mixer works, you’ve essentially got the foundation of knowledge you’ll need to adapt to any brand or style of mixer you may encounter in the future.
SO, WHO NEEDS A COMPACT MIXER?
For our purposes, we’ll be focusing on performing artists, as opposed to venues with installed sound systems or complex front-of-house setups. There are quite a few scenarios when it makes sense for a band to invest in their own compact mixer. For example, your rehearsal space (be it a garage, basement, commercial rehearsal facility or otherwise) is the perfect place to install a compact mixer. It’ll allow your vocalist(s) to be heard over loud drums and guitar/bass amps, and it’ll afford you the ability to tweak your live sound mix during the rehearsal process, so you can get a general sense of where your parts will sit in the mix when you hit the stage.
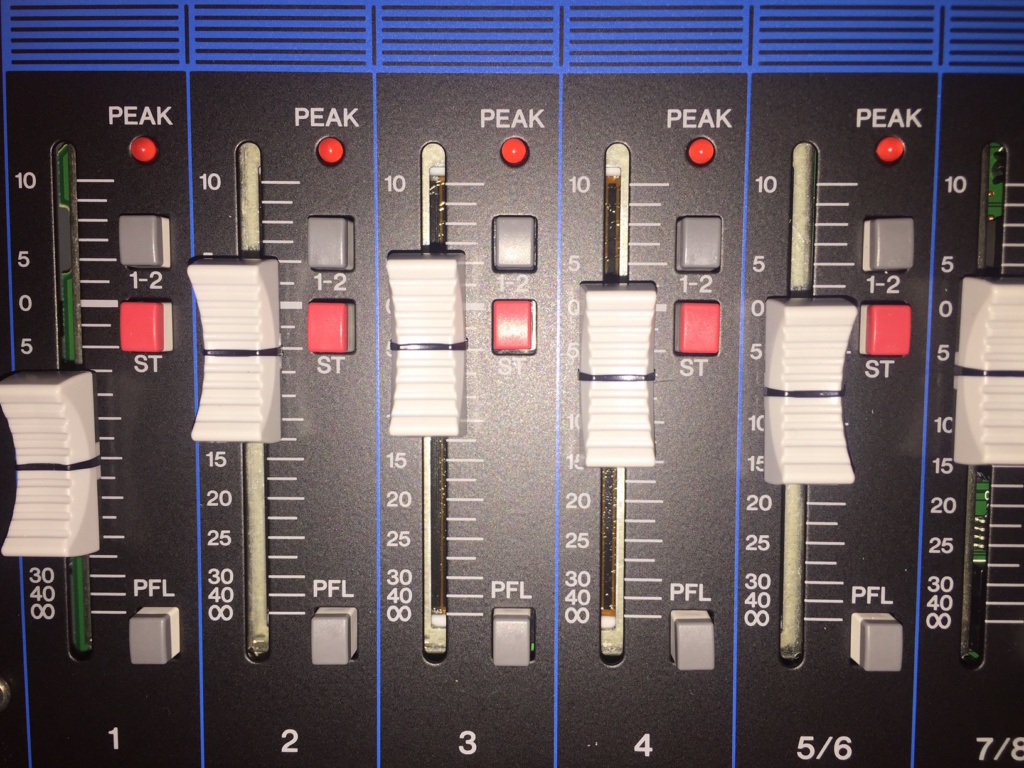
Yamaha MG12XU faders
Obviously, space can be at a premium when in a cramped rehearsal room, so compact mixers offer a small footprint that will still allow you to access all of the functionality you need, without taking up too much space.
The other main advantage of having a compact mixer on hand is that it allows bands to perform in non-traditional venues where there may not already be a PA system and sound engineer on hand. If you find yourself booked at rented venues, house concerts, churches, outdoor gigs, coffee houses, parties, etc., it may be to your advantage to put together a PA system for your band that can travel with you whenever the need arises.
THE INS AND OUTS
One challenge to figure out before you purchase a compact mixer is deciding how many inputs and outputs you’ll need for your particular setup. Oftentimes bands over- and under-estimate the number of inputs they’ll need. On the one hand, if you are solely using the mixer in a rehearsal situation and aren’t miking drums, then including drum mics in your input list may cause you to purchase a more expensive mixer than you actually require. Likewise, neglecting to factor in live gigs may lead you to purchase a mixer with fewer inputs than you need.
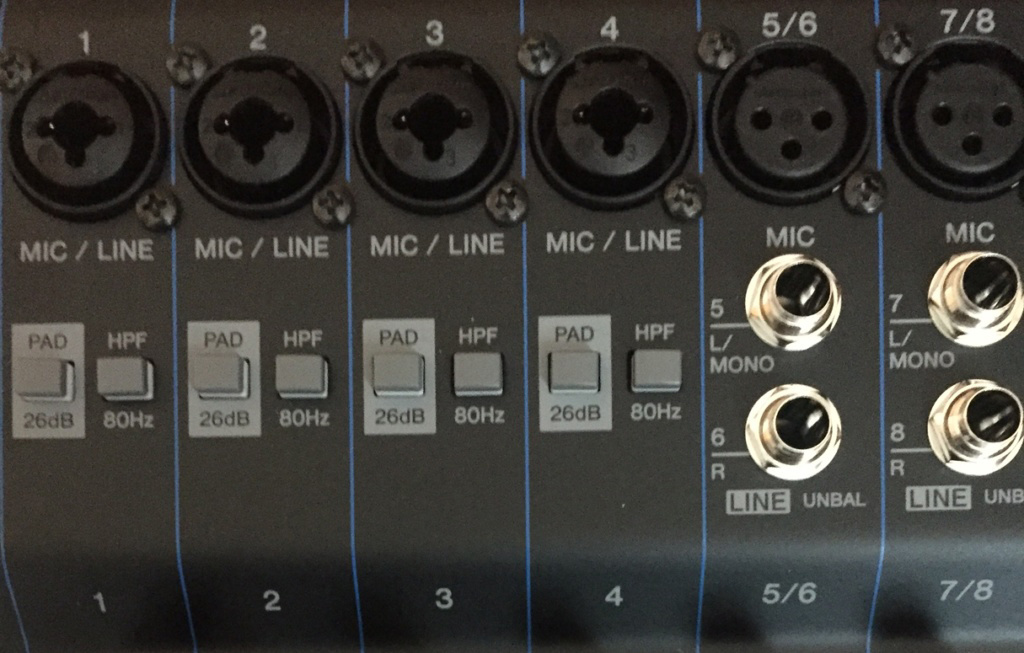
Yamaha MG12XU channel inputs
Most mixers will have a combination of input types, so compare wisely when it comes time to buy. You’ll often find a healthy number of XLR inputs for microphones, but may not find the optimal number of stereo or line inputs that your particular group may require. So, pay attention to the specs. Also, note that some mixers may claim a certain number of channels, but that does not always equate to the same number of mic inputs (or preamps). Again, always check the specs. Just because it says 8-channels, don’t assume you’ll be able to plug in 8 microphones. Some of those channels may be reserved for line inputs, stereo ins for synthesizers, or additional inputs for CD players, iOS devices and additional sound sources.
As far as outputs are concerned, make sure that whatever the compact mixer offers in outputs, you can match with the speaker system and/or powered amplifier you’ll be using to complete your PA system. Balanced XLR outputs are commonplace, as are quarter inch outs for monitoring. You’ll likely also want a dedicated headphone out to monitor the mix, as well, as it may be difficult to accurately place instruments in the mix when performing at full volume in tight spaces.
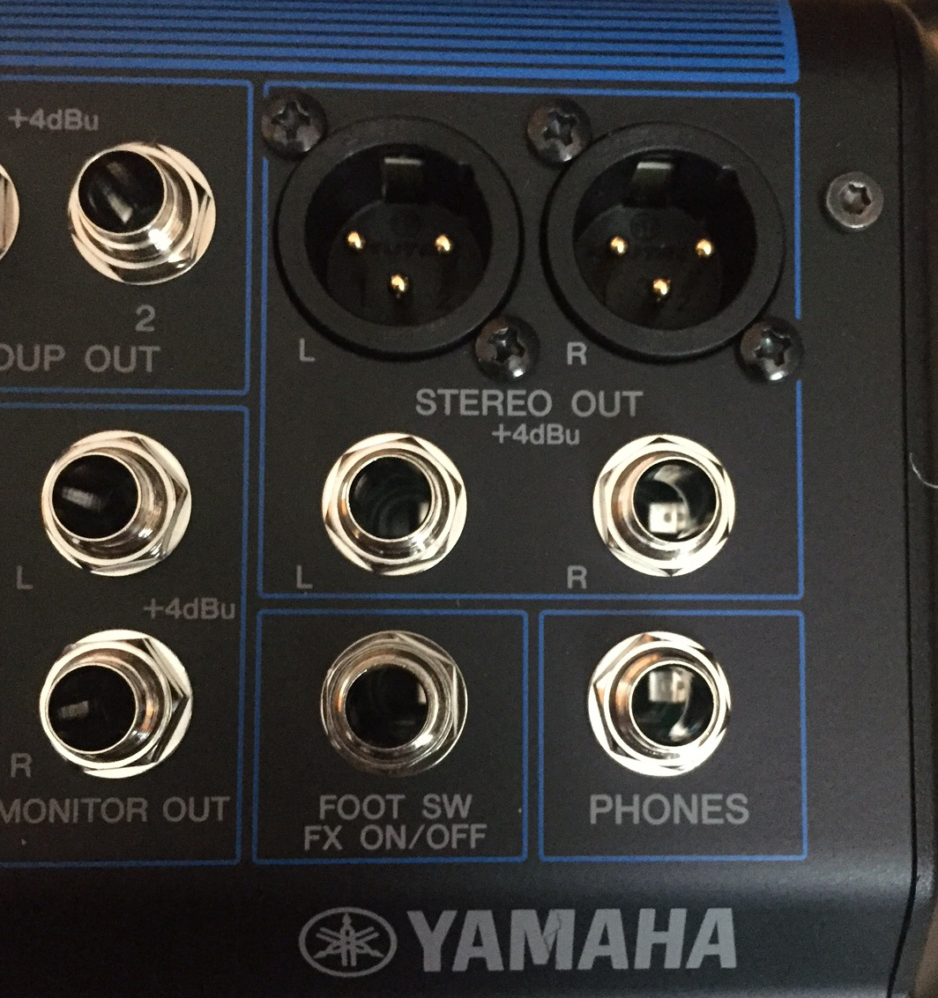
Yamaha MG12XU output section
CHANNEL STRIPS SIMPLIFIED
OK, so you’ve got the right number of inputs, and now you’re left starting at a seemingly endless sea of knobs, switches and faders. Relax, when you actually start to use a compact mixer, the one thing to keep in mind is that even though it may look intimidating, each channel of audio is set up in a repeating fashion, meaning that each vertical “strip” of knobs, buttons and faders does the exact same thing for each channel.
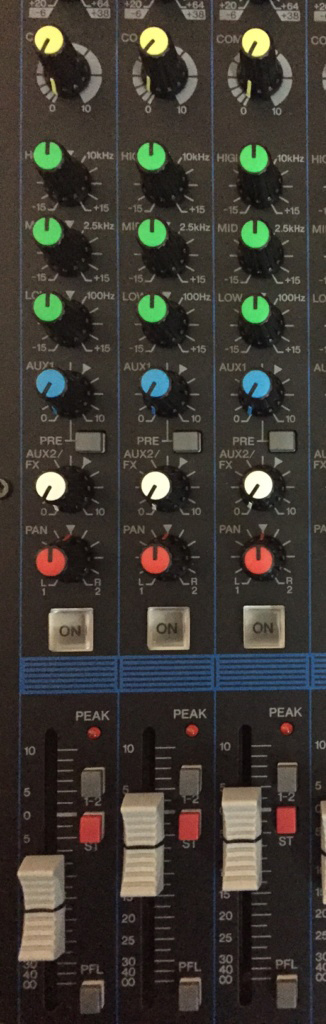
Yamaha MG12XU channel strip
Learn what each individual strip does, along with the “master” section for overall output, and you’ve now mastered the entire board (well, mostly). You see, a channel strip basically does a few simple things: it allows you to set the input gain for each channel so your incoming signal doesn’t clip (distort), it typically allows basic EQ settings, panning for stereo, the ability to turn on or mute/solo the channel, the ability to control fx levels (if the mixer has them built-in) and auxiliary sources, and finally the ability to control the overall volume (or level) of the sound source via a sliding fader.
Really, the channel strip is there so you can adjust the individual channels one at a time before they get sent to your outputs. And although it may look complicated, we recommend you start with the gain down, plug in a sound source (say, a microphone), slowly adjust the gain for a good level, and then begin experimenting with each knob to learn what it does by sound, rather than what it does by theory. We know it’s probably counter-intuitive to what every manufacturer wants you to do, but reading the manual last, after you’ve had time to get hands-on with the unit, sometimes is a good way to go.
PHANTOM POWER
Believe it or not, we’ve seen compact mixers with no phantom power options. So, when you’re out there shopping, keep an eye out for this. If you plan on using condenser mics, look for a phantom power button, or something labeled +48 switch somewhere on the unit. Not every channel may have it, but it’s usually pretty apparent, it may even have a corresponding LED to let you known when phantom power is engaged. Don’t overlook this.
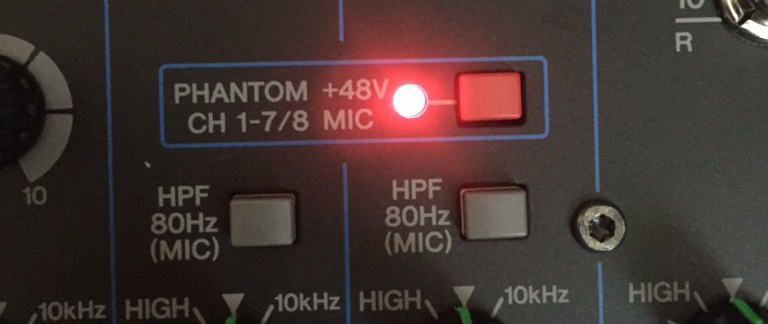
Yamaha MG12XU phantom power engaged
BUILT-IN EFFECTS
Oft-maligned, built-in effects in compact mixers have come a surprisingly long way in just the past four or five years. Today’s digital effects, even in some of the most affordable compact mixers we’ve encountered, can be incredibly useful. We especially like the built-in reverb (the reverb algorithm on this unit is of the same type as reverbs in the SPX90, which is in the TEC Awards Hall of Fame), compression, and chorus that are easy to dial in easily with the Yamaha MG12XU we were provided. In fact, the yamaha MG series employs the award-winning SPX effects engine.
And nowadays, adding these effects per channel is usually as easy as engaging the fx section and turning a knob to the desired effect. The MG12XU even has a handy screen to see what you’re doing. Don’t let preconceived notions from years past cloud your opinion of today’s digital fx; it may actually save you money by eliminating the need for outboard effects units.
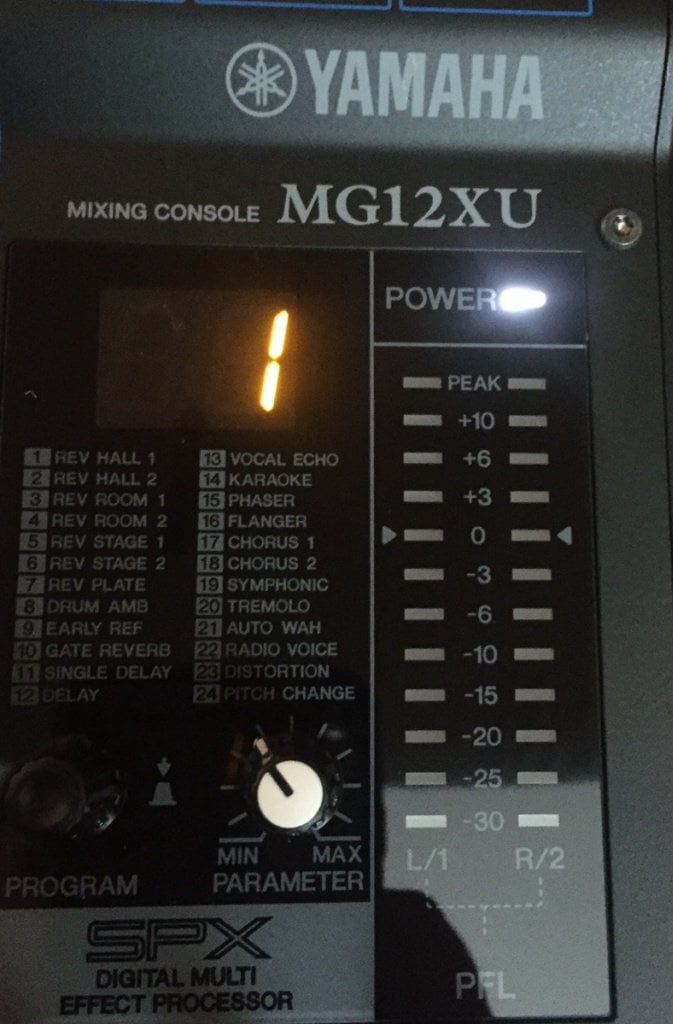
Yamaha MG12XU dialing in effects
BUILD QUALITY
One word of advice, and this carries over from the world of hi-fi: we generally (and take this with a grain of salt) advise bands to avoid anything that simply feels cheap. Now we know that there are low-cost units that may not have all the bells and whistles of their big brother and big sister counterparts. That’s not what we’re getting at; we’re talking build quality here. We like rugged metal chassis. We like knobs that aren’t wobbly and won’t break off after a few subtle turns. We want real, decent sized faders that don’t feel like Tic Tacs under our fingers. In general, even with the most affordable units, we want to know that our compact mixer can withstand the abuse of the studio, stage and rehearsal room. Anything less is to be avoided.
RECORDING ABILITY AND TABLET/SMARTPHONE SUPPORT
Lastly, many of today’s mixers can also double a studio devices, enabling you to record rehearsal and jam sessions straight into your DAW. We were stoked to find out that our MG12XU has a USB output and came with a workable version of Cubase. So, we can now take our 2-channel stereo mix, pop open a new session, and listen back to what we’ve been rehearsing. BONUS: if you have a camera connection kit, you can hook up your MG series mixer to an iPhone or iPad via USB for recording or playback. Plus there’s even a free MG recording app called MG Rec&Play available for download in the App Store.
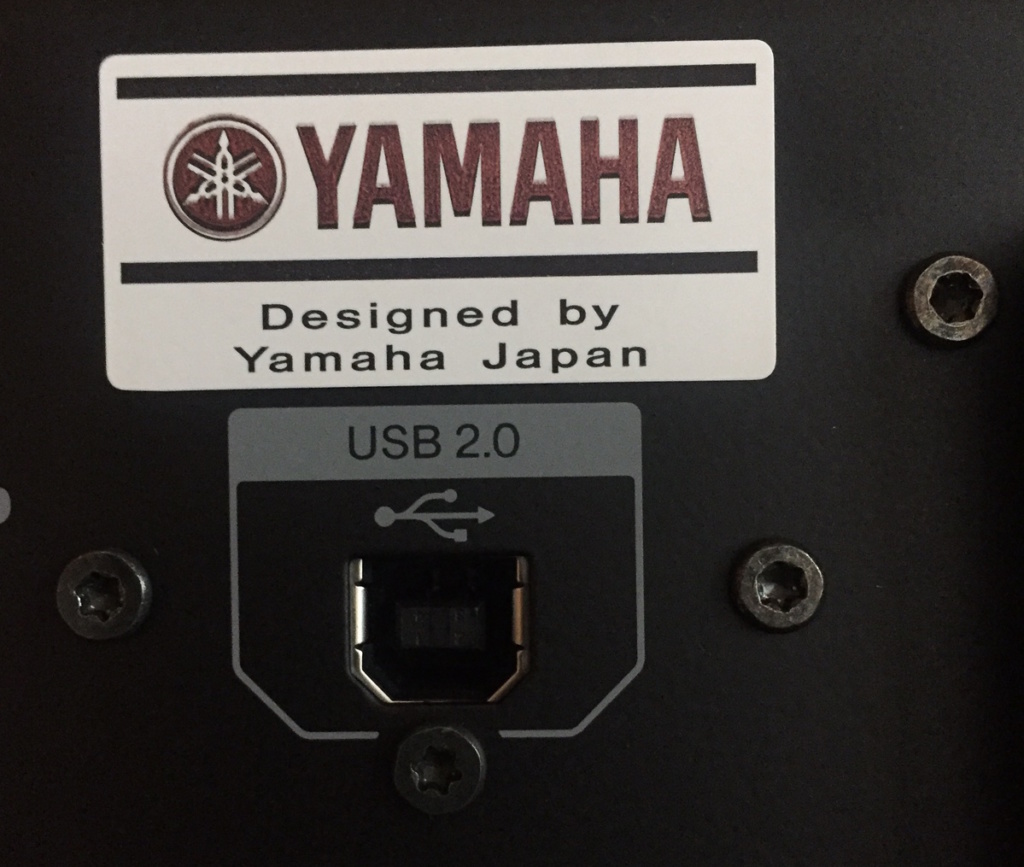
Yamaha MG12XU USB output
It’s also a cool way to offer instant live recordings to your fans, if you’re interested in that capability. There are even some mixers that offer direct support for tablets and smartphones, enabling you to directly mix on-the-fly using an app that syncs to the mixer itself. Many of these features can increase the cost of the unit, but if you want the flexibility to mix from an iPad on stage or record your songwriting sessions and gigs, these are features to be on the lookout for.
READ THE DANG MANUAL
As mentioned previously, we put this last for a reason. Just like with synthesizers, it’s often a good idea to just get your hands dirty, so to speak. Twist knobs, slide the faders; learn by doing. It’s truly the best way for your brain to comprehend how the adjustments you make on the board affect the sound in your mix. It’s one of the best benefits of tactile units like these. Then, if there are still elements of the mixer you don’t understand, whip out the manual and it’ll all click into place much easier, since you’ll likely have a good handle on everything surrounding that one button you can’t quite figure out.
We hope this installment gets you on your way to purchasing the right compact mixer for your needs. Stay tuned for upcoming parts of the series that will further explore PA speakers, more advanced mixer settings, and tips for getting better live stage sound. Until then, be sure to check out the entire range of Yamaha live sound products here and follow them on Facebook and Twitter.
CONTINUE TO PART TWO: HOW TO SET UP PA SPEAKERS
or