![]()
Welcome to the second in a four-part series on getting better live sound, co-presented by Performer Magazine and Yamaha.
DON’T MISS PART ONE: WHAT TO LOOK FOR IN A LIVE MIXER
In this installment, we’ll take a closer look at setting up a basic PA speaker system, and incorporating it with your band’s compact mixer. The systems we’ll be describing today are going to be simple, and best suited for groups using PA’s for band rehearsals or traditional venue gigs that don’t already have installed PA systems. We’ll also touch upon some additional features of PA speakers that you’ll want to take advantage of.
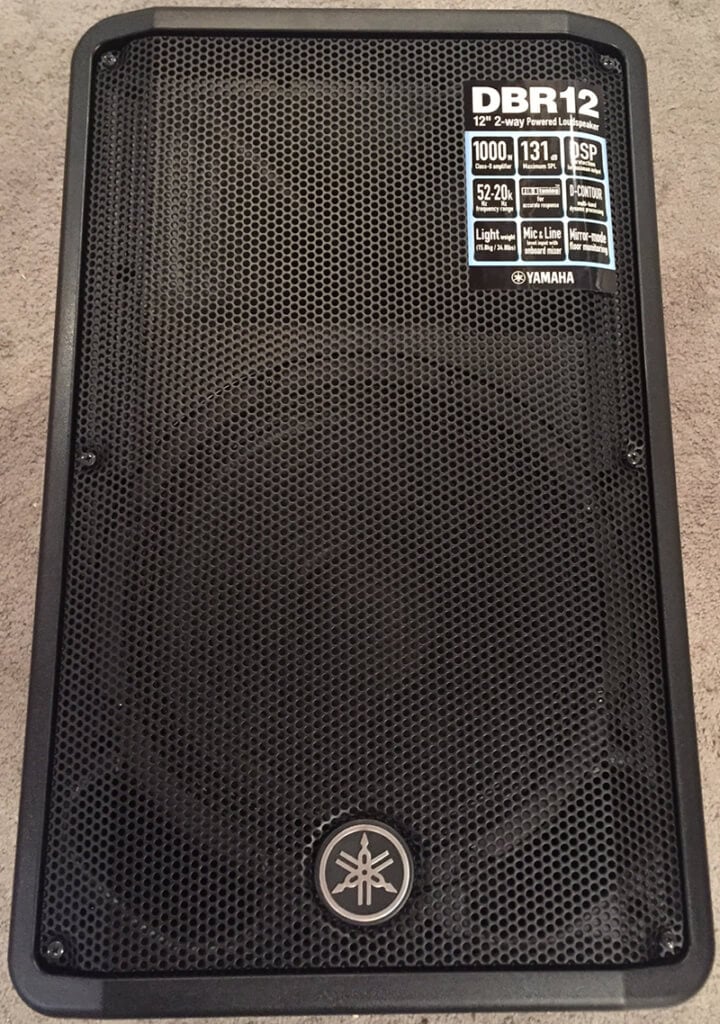
Yamaha DBR12 PA speaker
Yamaha has been kind enough to loan us two PA speakers from their wonderfully affordable DBR line of powered speakers, so that we can highlight how they work, and define some commonalities they share with other speakers of the same type.
There are a few specific features of the DBR12’s that we should highlight. For starters, the DBR12 features 1000 watts of power, but remarkably, they are INCREDIBLY lightweight and easy to transport, thanks to some crafty engineering by Yamaha and very useful built-in carrying handles. We’ve tested countless PA speakers before, and trust us: if you’re going to be doing your own load-in/load-out, weight can become a significant factor in your purchase decision. Also a factor: the ability to easily handle the PA speakers during transport. We’ve been baffled by the lack of handles, the awkward aesthetics and downright terrible form factors of some of the PA speakers we’ve been sent for review over the years. Thankfully, the DBR12’s hit the mark in every respect.
[insert_ad]
Another great feature of the DBR series is the on-board controls that allow you to select different sound contours depending on whether you’re using the speaker as a main monitor or floor wedge. A super nice touch that will cut or boost the necessary frequencies accordingly for each situation. We’ll talk about this more in a bit. But first…
PASSIVE VS. ACTIVE
When setting up your PA speakers, or seeking a new set of speakers for your band, it’s important to make the distinction between passive and active speakers. Just as in the world of recording, where monitors come in both versions, so do speakers in the PA realm.
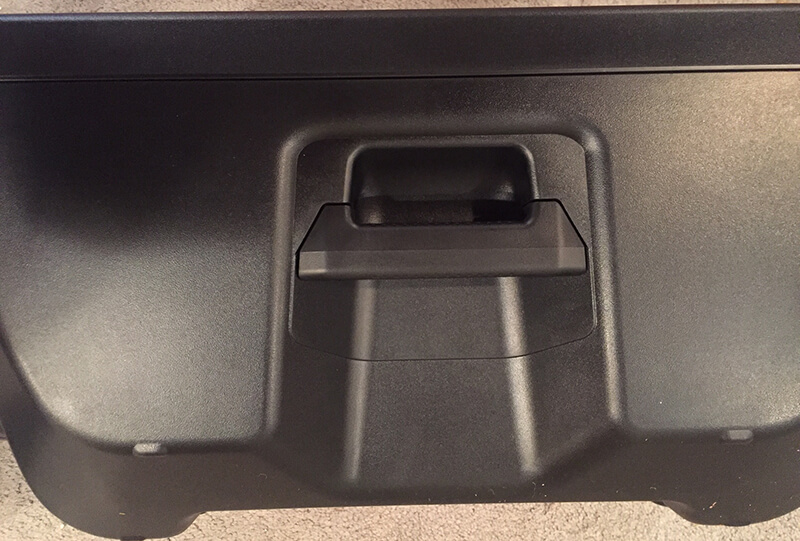
We love the ergonomic handles on the Yamaha DBR12 PA speakers
So, what’s the main difference? Well, like the name implies, passive speakers do not require separate power cables to operate. You’ll plug them directly into an amplifier using speaker cables, and you’ll be all set. Now, what are the downsides, and why would we recommend you gravitate towards active speakers for your PA setup? A few reasons, chief among them being you’ll likely need to add a power amplifier in addition to your compact mixer in order to properly complete your PA system with passives. That means more pieces of gear, more cabling, more expenses, more stuff to lug around, and more things in your signal path. Now this might be a great option for large halls and venue installs, but for traveling bands who need portability, it’s typically a non-starter in our book.
Active speakers, on the other hand, have power amplifiers and crossovers already built in. Yes, you’ll need to plug them into wall power and they may be slightly heavy (sometimes), but they can greatly reduce your setup’s complexity and speed up load-in/out times for gigs. Trust us; we’ve done this before. We highly recommend going the active route with your PA speakers.
THE INS AND OUTS
Once you’ve got your PA speakers unboxed, examine the I/O interface (typically located on the side or back of the speaker). You’ll likely find a few main components:
On/Off switch: self-explanatory, but remember, if you’re using active speakers and aren’t getting any sound, this might be the likely culprit. And of course, make sure your power cable is plugged in to the AC outlet for each speaker in your setup.
Inputs: on our DBR12’s, and many other similar types of speakers, you’ll likely find line inputs for things like CD players, laptops, and other-line level instruments like synths, in addition to mic/line combo inputs that accept both 1/4” connectors and XLR in one handy input. What we like about this is you can send a signal out from your compact mixer, or simply plug in a mic and instrument if you don’t have the need for all the ins and outs of a dedicated mixer (say, you’re a singer/songwriter doing a coffee house gig or house concert). Don’t feel overwhelmed here: for simplicity’s sake, just run the left main out from your mixer to the left speaker input and repeat for the right channel.
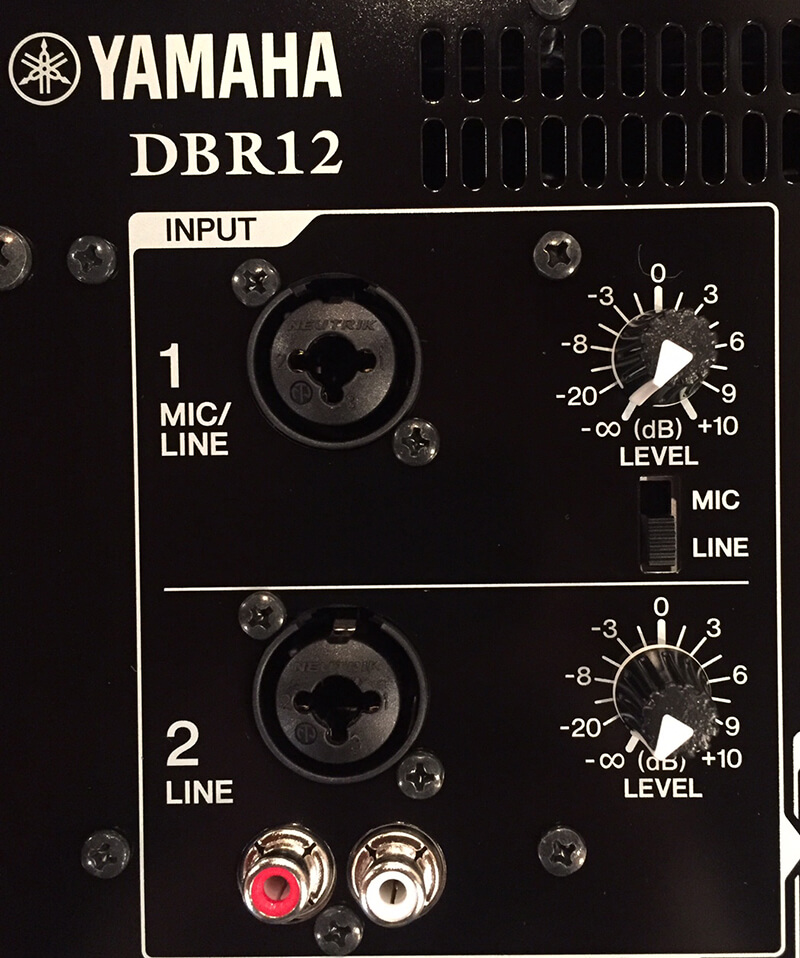
Yamaha DBR12 inputs and level adjust
Levels: here you’ll be able to adjust the output volume of your inputs. Pretty straightforward and something you’ll enjoy about active speakers.
Outputs: active speaker outputs allow you to chain together additional speakers for floor monitoring situations, which is not only super-handy but also ultra-easy. A simple XLR chain allowed us to hook up one of our DBR12’s as a floor monitor, taking output from another DBR12 we were using as an additional floor unit.
Cut-off filters: these will differ from model to model, but the main idea here is to set the desired cut-off frequency in case you’re adding a subwoofer to your system. This way your mains and subwoofers will work well together and not cause a frequency headache out in the audience. Pro tip: set the High Pass on your mains to match the low pass on your subwoofer(s).
CABLE MANAGEMENT
OK, so we know the ins and outs of our new PA speakers. What do we use to hook everything up?
Our recommendation, as most active speakers will have balanced XLR inputs, is to use XLR cables from your compact mixer’s main outputs, and run them to your speaker’s XLR inputs. Typically speaking, though, cable management will be fairly easy as you’ll be limited to what your gear has available, so just take a look at the control panel or check your manual if you’re unsure. Here are the most common cables types you’ll encounter:
XLR: 3-pin connector that’s ubiquitous in pro audio. Used to hook up mics to mixers, and mixer output to speaker systems. Very common, you’ll likely want a few XLR cables in your cable bag at all times.
TRS and TS: the other most common cable type, this is a 1/4″ (sometimes 1/8” for headphones) cable that stands for tip-ring-sleeve or just tip-sleeve, depending on type.
speakON: you may encounter these types of connectors, or you might not. If your equipment doesn’t feature speakON connectivity, don’t worry. They’re typically found on very high-wattage units and are super rugged so they can handle all that power. This type of connector is found in passive systems.
WEDGE OR POLE? WHY NOT BOTH!
One of the nice features of our DBR12’s, and many PA speakers, in fact, is that they’re versatile in their applications. Simply put, you can use them as pole-mounted main speakers for your PA setup, or as wedge monitors on the floor.
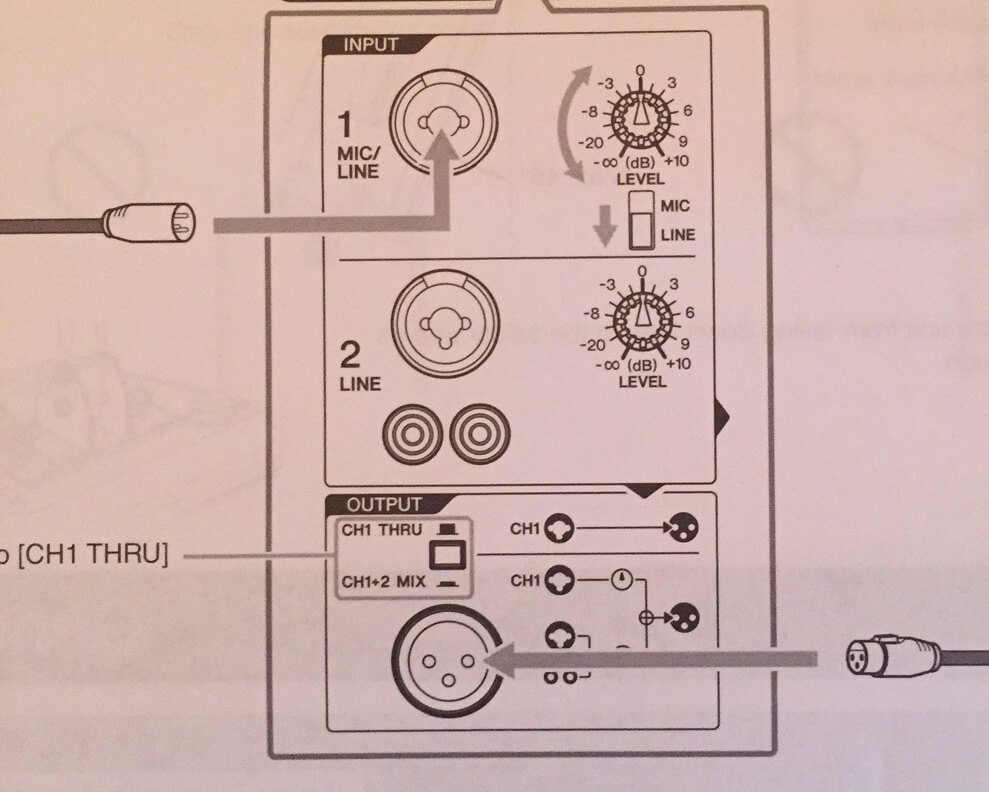
Diagram outlining how to hook up floor wedges in parallel
Setting up your speakers as mains typically just means sliding them onto industry-standard speaker stands, and adjusting the height properly. One mistake we commonly see is PA speakers set WAY too low. We’ve even seen them practically on the floor! People’s bodies will get in the way of the sound projection coming from your PA, and they’ll actually absorb and disperse frequencies in a very unwanted (and non-musical) manner. If you can, try to set the units about 6-8 feet high – this’ll help in two ways. First, you’ll be able to reduce the massive, ear-bleeding volume blasting your fans at the front of the stage (where they don’t really need it, since they’re so close), and second, it will alleviate frequency absorption and help those highs reach the back of the room, where they would have otherwise died up front. Ever notice that when you’re in the back of a club, you can’t hear the singer properly? One common cure is to raise the PA speakers; it can make a world of difference in what your audience hears.
TO SUB OR NOT TO SUB?
So far, we’ve only addressed using your PA speakers as mains and floor wedges, for good reason. It’s been our experience (and we’re sure to get lots of nasty notes on this), that in many cases subwoofers just aren’t necessary. If you’re in a typical band setup, and especially if you’re not playing aggressive or bass-heavy music, a nice set of PA speakers is more than capable of handling just about all the sound requirements you could throw at them (including handling your low end, that’s why you got 12 or 15-inch speakers in the first place, right?)
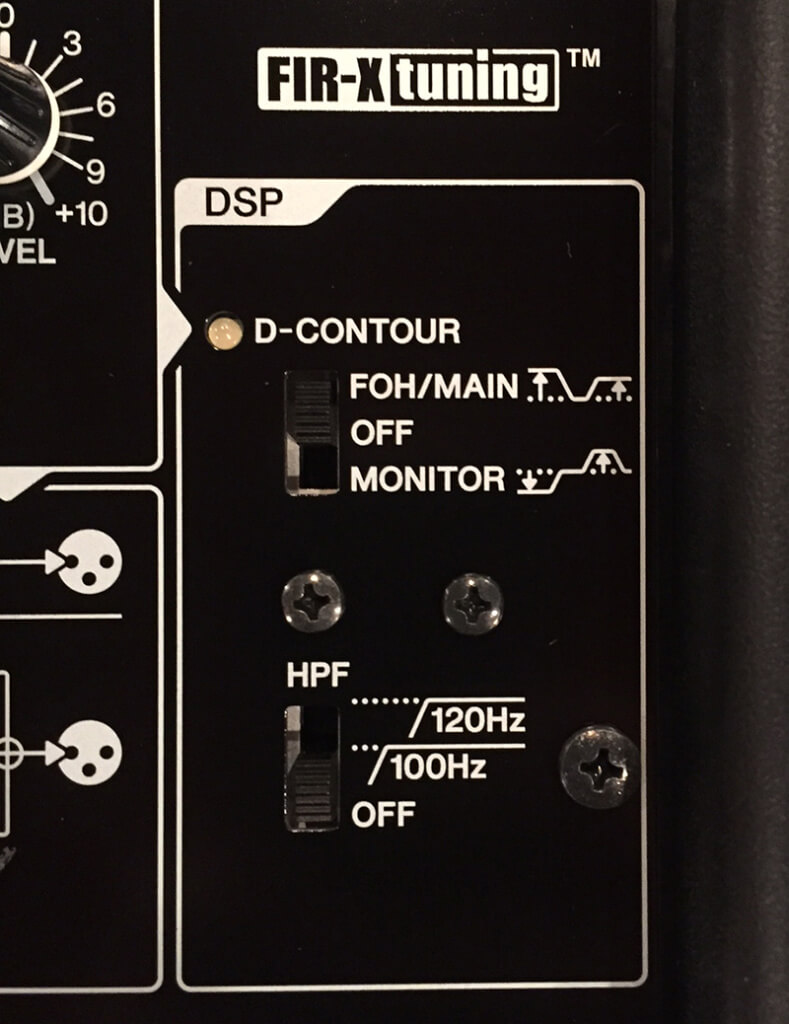
Yamaha DBR12 contour and high pass filter controls
Subwoofers usually tackle the 20Hz to 100Hz spectrum, which can greatly help you achieve a full-range sound; that’s true. It’s also true that you can actually lower the output volume of your mains a tad when you integrate subwoofers in the equation. But if budget and van space are at a premium, skip them for now. The only times we’d really recommend subwoofers are for DJ, EDM and synth-heavy acts that truly need optimal bass reproduction in order to fully have their work come across. Otherwise, add them as needed and as budget allows.
CLOSING THOUGHTS
We hope this installment gets you on your way to purchasing the right PA speakers for your needs, and setting them up properly in your rehearsal space or on-stage. Stay tuned for upcoming parts of the series that will further explore advanced mixer settings, and pro tips for getting better live stage sound. Until then, be sure to check out the entire range of Yamaha live sound products here and follow them on Facebook and Twitter.
ON TO PART THREE: SIGNAL ROUTING OPTIONS ON YOUR LIVE MIXER
or