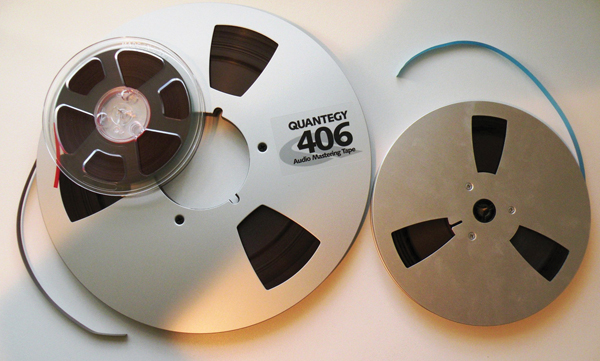
 The choice to mix the analog warmth of tape with the editing/automation capabilities of Pro Tools will help to open up options when it comes to mixing, but will require a well laid out plan. If it’s decided that analog will be introduced to the digital editing world, the pursuit of a tape machine that is in impeccable condition will be necessary to assure the fewest headaches along the way. Here’s a quick guide to make sure what you’ve recorded to tape will import properly into Pro Tools.
Pre-Production:
Your engineer and producer must first figure out when and where to use analog technology and/or digital and how it will affect the end mix. Tracking is one of the most crucial points in a recording project; getting a clean signal to tape before you even begin to think about touching Pro Tools is key. When recording to tape, one must be savvy with analog gear to get the most out of the machine and its abilities.
Everything that is added, whether analog or digital, is another element in the chain that can potentially add more problem points, which in turn requires more attention from the engineer. So a troubleshooting background in both the analog and digital worlds is essential when introducing multiple audio formats. Also, consider these basic questions: What brand of tape machine will yield the best quality at my price point? How many reels will I need for the project I wish to record? Has the tape machine had any mechanical calibrations done recently? Will an engineer or an audio professional be doing the calibration? These factors will directly impact the quality of the sound coming from the recorded tape. One of the most common factors to a malfunctioning tape machine is the fact that many pro reel-to-reel tape recorders have been dormant for years and have not been properly maintained. So, making sure it has been optimized before basic tracking is essential, and having a professional calibrate the machine will be worth the extra money and will ensure that the machine will operate at an optimum level for the duration of your project.
Analog:
The analog side of the session will require a little bit of set up. Calibrating the machine will be the first step in making sure it’s ready to go. Mechanical calibration of a tape machine will require an understanding of the way the head stack and tape work together. This is usually best left for a professional. The record calibration will take place on a channel-by-channel process. This will assure that each channel is functioning properly and that they are ready for recording and/or playback of your material. Once the calibration process has been taken care of, connect the tape machine’s outputs to the input of your Pro Tools system.
An external clock that has a time code input will be needed, as this will be utilized during playback. Your analog tape should have had LTC (Linear Timecode) printed to it so that Pro Tools can “chase the machine,” assuring proper syncing of the analog and digital mediums. This should be printed using the last channel of the tape machine. For example, on track 16, since the channel below it (15) is usually left blank as a guard track to prevent audio bleed. Once the LTC is located, the output of the last track will plug into the in port on the external clock. Connecting the outputs of the tape machine to the inputs of Pro Tools will get the tracks passing from the tape machine into the DAW (Digital Audio Workstation). For a digital transfer, make sure the tape machine plays back from the reproduction head, as it will have the best sonic quality.
Digital:
Now that the tape machine is ready to go, the DAW will be the only thing left to set up for the project. Once outputs of the tape machine are connected to the inputs of the of the AD converter, it is time to get Pro Tools set up. The session will first need to be initialized. The desired bit depth and sample rate will have to be set so you can properly edit your analog tracks with your digital tools. Add the number of tracks needed for the transfer; it’s always best to take the time to name all tracks now to avoid confusion later. Putting each of the tracks in input mode will allow for the checking of each one to be sure that they are all being sent properly to the DAW. As always, before moving forward make sure that a good signal level is being sent from the tape machine to Pro Tools by keeping an eye on each machine’s meters. During the transfer it is usually best to keep Pro Tools clean of unnecessary plug-ins, sends, or anything else that could slow down an already intensive session.
The melding of the digital and analog worlds is a big task for any engineer, but with a solid background, some experience and a good team, you can get the benefits of both worlds to truly capture the sound you’re looking for.
