1) Manage your working space with Memory Locations
You probably already use Memory Locations as markers, but did you know you can also use them to create custom views in your session? Memory Locations can remember which tracks are shown, track heights, zoom settings, and also the layout of Pro Tools’ windows.
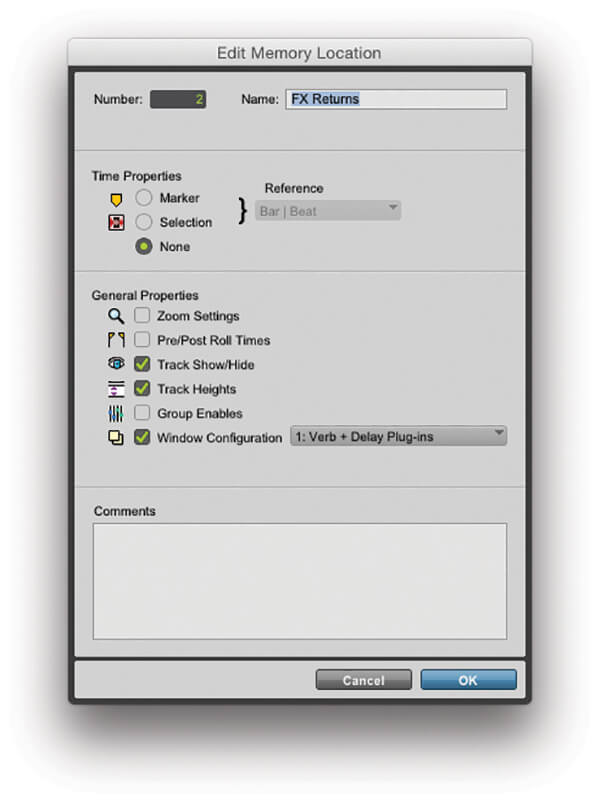
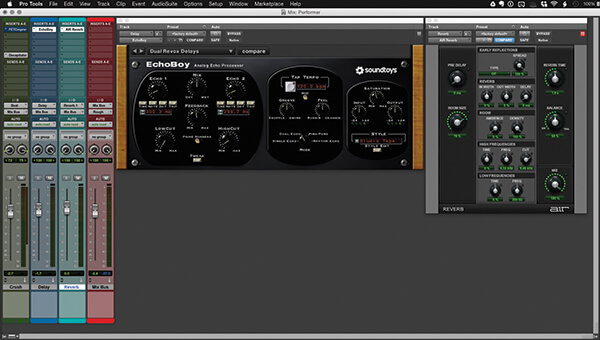
For example, you can store focus views of different instrument groups. Screenshot 2 below shows a memory location that recalls FX return tracks and uses a Window Configuration to open the reverb and delay plug-ins. Shortcut tip: To recall a memory location from the keyboard, press period on the keypad, then the location number, followed by period again.
2) Save Time with Templates
Pro Tools professionals live by their template sessions. A template saves a bunch of time-consuming setup work by starting a project with all your tracks, plug-ins, routing, groups and view options in place. Any session can be used as a template by choosing File>Save As Template… Screenshot 3 below is a template for tracking a small band. There are tracks ready for drum mics, a bass DI and Mic, a vocal mic, and some guitars. Each group has been color-coded and routed to a submix (see tip 3). Shortcut tip: To change to several tracks at once (e.g. set output, add plug-in, etc.) select the tracks, then hold Shift+Alt while making the change.
![]()
3) Route to Track
There are often occasions when you want to route a track to another track. A common example is routing the outputs of several tracks to an Aux Track to create a submix with processing on it. Other examples include creating Sends on many tracks to a reverb return, or to a headphone mix master. Recent versions of Pro Tools make this an easy task, with no need to make buses or tracks manually. Screenshot 4 below shows this trick being used to create a drum master bus. The drum tracks are selected, and the “do to selected” shortcut is being held.
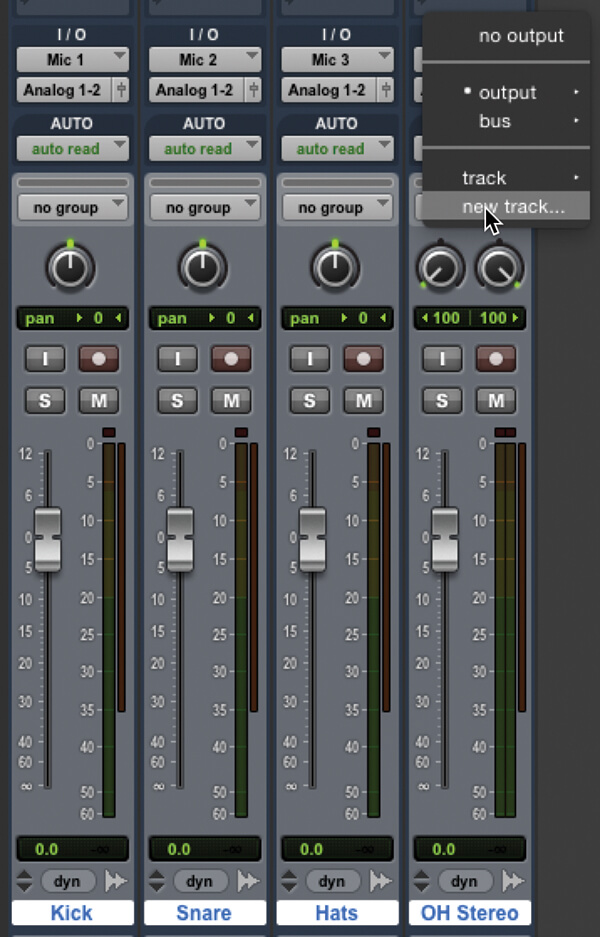
In the Output Selector menu there are options for Track and New Track, as well as the Output and Bus menus. Choosing Track will let you route to an existing track in the mixer, while New Track will bring up screenshot 5 below, asking you to choose a track type and name for the submix. Everything else will be taken care of for you.

4) Elastic Time Tricks
Elastic Time and Pitch are technologies in Pro Tools that you may have used to warp and time-correct your recordings. Here are a couple of other uses:
Audition in context:
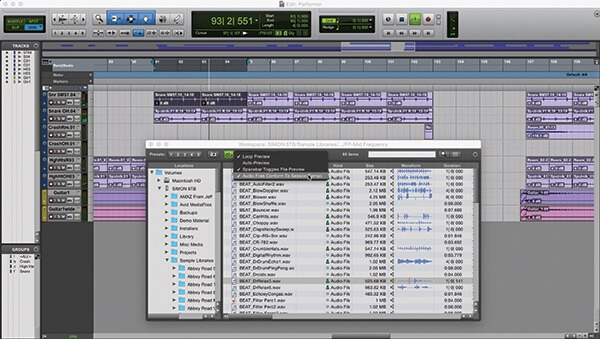
The Pro Tools Workspace can audition loops in time with your session. Right click the audition button to see all the options (screenshot 6 below). Now if your session is playing, loops will be previewed in time!
Change tempo of whole session:
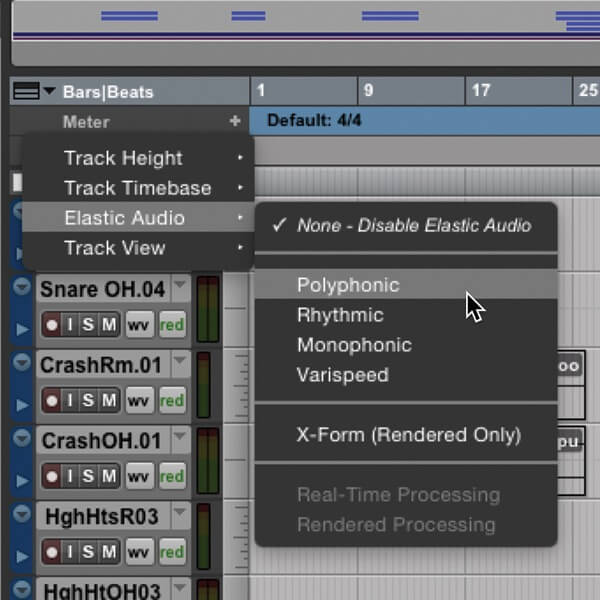
If you want to change the tempo of the whole song and have all tracks follow the grid, do the following: First enable Elastic Audio on every audio track (screenshot 7 below). You can do this by holding Alt while changing any track’s mode, or you can select between polyphonic or rhythmic on a track-by-track basis
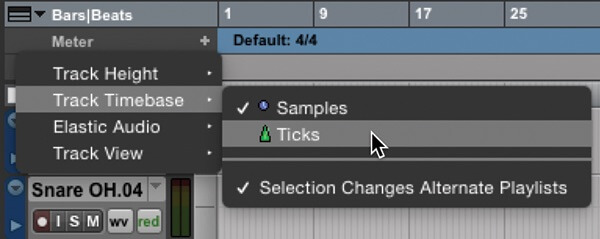
Next switch every track into “Ticks” timebase mode (screenshot 8 below). This means the tracks follow the bars/beats grid instead of absolute time. Now any changes you make to the overall session tempo or the tempo ruler will affect the whole song.
5) Latency-free overdubbing
The audio engine in Pro Tools 11 and 12 lets you set a very small hardware buffer and enjoy low latency when recording and monitoring through Pro Tools. Sometimes, though, you get to work on the mix, then try recording an overdub and hear a delay in the input signal. This is usually because you’ve added plug-ins with inherent processing latency, such as bus compressors/limiters. No problem – simply make sure that the output of the record track is routed directly to the output you are monitoring through, instead of to an internal bus. Pro Tools will work behind the scenes to make sure what you play is bang in time with the rest of the mix.
ABOUT THE AUTHOR
Simon Sherbourne is a Pro Tools specialist at Avid and was previously a columnist for Sound on Sound. For more info, follow him on Twitter @simonsherbourne.
