Editor’s note: In the recent Vocal Chain Issue, we shared some tips on recording vocals in a home studio. Here is another take, and some additional perspective on the process. Not every approach will work for every artist, so we’ve taken the opportunity to present a few viewpoints on the subject, and hope you’ll be able to take away some key tips from each that’ll help you in your journey to record the best vocals possible within the limits of a home studio environment.
The lead vocal – it’s arguably the most important track in most songs. It’s carrying the melody and message and overall tone of the song and it’s what most listeners lock onto over anything else. Try asking someone why they like a particular song and chances are their comments will be about some aspect of the lead vocals. So how do you record a great vocal part? Here are some tips we have found over the years that help the vocalist perform at their best.

CAPTURE THE BEST PERFORMANCE
First, it’s easy to forget (even for some vocalists) that a singer’s voice is their instrument. Try to schedule your vocal takes when the singer is at their peak. That means not scheduling a session right after a long weekend of gigs or even after a long day of work. Most vocalists have a time of day that they perform best. Have the vocalist warm up first. Some vocalists have a set routine; others don’t even know what you’re talking about when you ask about warm-ups. For the latter, a couple softer than usual warm up takes can help get them ready. Have plenty of room temperature water on hand in the booth for the talent and remind them frequently to keep their pipes hydrated.
SET THE MOOD
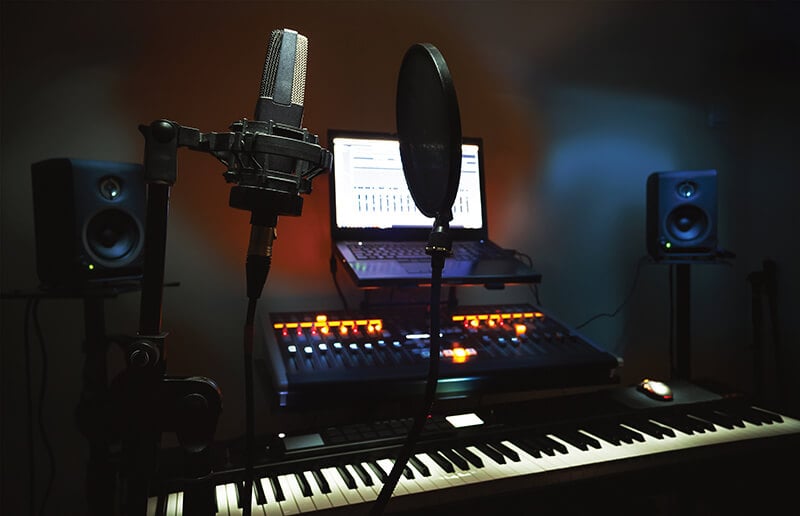
It’s important for the singer to be in the right mood when they are recording their tracks. It can be hard to sing about a relationship gone bad in a bright, sunny room with posters of puppies on the wall. What is the overall mood of the song that you are working on? Try to prepare the booth to match that tone. Here in the studio we use different colors and intensity of light to obtain the right feel for the track we are working on.
WHAT’S THE SINGER’S PERSONALITY?
If the singer thrives on attention, then having band members and friends in the control room as an audience can sometimes help bring the performance to another level. But many singers get self conscious quickly when the focus turns to them, and so often we will turn down lights in the control room and position the singer in the room so that they feel less like they are in a fish tank being watched. Encourage the talent to try different approaches if they are so inclined and remember that positive reinforcement after each take helps to keep a singer’s confidence up.

BACKING VOCALS
Many performing artists don’t have the luxury of dedicated backup singers when they perform live and so when recording songs in the studio, often they overlook the importance of backing vocal tracks. When we as listeners hear a song, we accept backing vocals without much thought, but interestingly we have witnessed that many artists get very self-conscious about recording backing vocals. Maybe it’s because the lead singer or even “non-singer/instrumentalists” in the band now have to play a new role. Frequently harmony parts aren’t even written until late in the recording process and often we find many artists who don’t even know how to go about writing them. Our advice is to bring in someone who can help write these parts early in the rehearsal process. This will save you much time and stress in the studio.
IMPORTANCE OF A GOOD HEADPHONE MIX
Probably the single most important aspect to getting a good vocal performance is the headphone mix. Singers usually like to hear a lot of themselves in their headphones, but counter-intuitively, that is not always best. Most singers do better hearing themselves naturally, which means a combination of the vibrations through their bodies and reflections of their voices in the room. There are two categories that most headphones fall into – closed and open.
Closed cup phones (like the affordable Sennheiser HD 280 PRO) block out much of the ambient room and are a nice choice when other loud instruments are present; they also help keep the music from leaking into a hot mic. Open cup (like the AKG K 240) have a more natural feel but allow more unintentional leakage. If time allows, let the talent audition a couple different pairs to see which they prefer. Headphones give singers a version of themselves that they may not be used to (even though this is how the rest of the world hears them). So we often suggest they experiment a bit as they warm up, with moving one cup off their ear a bit until they find a sweet spot between the room and headphone mix.
MIC CHOICES
While there is no right or wrong answer, you hardly ever can go wrong with a large (3/4″ – 1″) diaphragm condenser mic on vocals. If your budget is limited, there are many low cost mics that do a great job – check out the MXL 990 or Audio Technica AT2020, great choices for under $100. For a few hundred bucks the choices are virtually limitless and many vocal mics double as great instrument mics as well.

MIC TECHNIQUE
A good vocalist will know how to use the mic to maximize their performance – moving in closer for softer, breathy parts and backing up and turning slightly when they want to belt something out. We almost always use a pop filter to help eliminate plosives (say the word “pastrami” into your hand and you’ll feel what I mean). The pop filter is a good visual reference for singers and you can give them a little primer on moving in and out; but mark my words, if the singer is not already a pro at using mic distance, they will completely forget to do it during their performance, anyway.
We have had good luck using a mic isolation shield (like the Auralex MudGuard) to help minimize unwanted room reflections that can color a vocal performance. These are especially helpful if you are forced to record in a less than optimal space. Use low-key sessions (like demos and sessions with friends) to experiment with different mics and their placement. You get different tones when the mic is set up in different locations around a singer’s face, but many singers intuitively try to stretch up to the mic as they sing, counteracting our efforts.
GETTING THE LEVEL RIGHT
With vocal takes we always want to have headroom on the recorded track, but most vocal performances are very dynamic. There may be a whispered verse followed by an exploding chorus. You can boost lower parts but you can’t fix digital distortion, so how do you capture both on the same take? Answer: Input Limiter. We almost always use a compressor on the input channel set to do the job of a limiter, which means a very high compression ratio, a very fast attack and a fairly quick release. Depending on the range of signal we might employ some input gain to help boost the lower, whispery parts and set the threshold 2dB lower.
MULTIPLE TAKES
Many singers want to “nail” their performance from start to finish. While that would be ideal, it hardly ever happens. We like to record the vocalist two or three times all the way through a song, have them take a break and come back into the control room to listen. Usually we’ll find that one of the takes is a good “base” take. We’ll then replace “bad” lines from other takes. When we’re done with this process we usually have most of what we need, with maybe a couple lines that need to be overdubbed. A note about replacement: while you can zoom down and replace individual words and syllables, it is usually much more organic to capture and replace whole phrases whenever possible.
TO TUNE OR NOT TO TUNE
Some singers are pitch perfect, but unfortunately many are not. Subtle pitch correction can usually do wonders (make sure to set the key on the plug-in to the song’s key – never use chromatic auto-tuning) and many singers will be thankful. Other singers want to go back in the booth and get it right themselves – and sometimes they do. But often they don’t and they just end up getting frustrated and embarrassed as they do take after take, trying to improve.
COMPRESSION, A SINGER’S FRIEND
Without compression, much of a vocal take can get lost in the mix – all that sexy, breathiness gets buried. With compression, you can turn up the gain, often in the 7–10 dB range, to bring the singer to life and put them front and center in the mix. Play around with the threshold and attack so that their loud parts aren’t too loud. The compression ratio should be in the 6:1 to 12:1 range.
EQ
We usually roll-off the bottom end unless the singer is using a low register. An exciter or Sonic Maximizer plug-in might be all the EQ you need to give the track some extra “air.” If the vocal isn’t quite cutting through the mix, first try to subtract frequencies from other tracks that may be masking the vocals (guitars in the 500–1000 Hz range are notorious examples). If the vocals still need some help, experiment to find and cut any “annoying” vocal frequencies and boost “pleasing” frequencies (like up around 4khz) with some slight gain.
WHERE TO PAN IN THE MIX
Panning is almost always right down the middle, unless you are going for some kind of effect. If the vocalist has that “It” factor, then we’ll put them up hot in the mix. But if you find yourself getting tired of the vocals quickly, then work on recording backing vocals and even melody tracks to help strengthen the lead vocal in the mix. We use volume automation to bring the dynamics of different instruments up and down throughout the song to keep the mix alive and keep the listener interested. Don’t be afraid to add a little delay to vocals to add excitement (but keep delay times short). We recommend a separate reverb send exclusively for vocals with a high pre-delay to preserve clarity.
