 Read our expert guide to setting up your home recording studio and home studio equipment, co-presented by Yamaha.
Welcome to the first in a four-part series that will provide real-world advice for setting up your first home recording studio, co-presented by Performer Magazine and Yamaha. In this installment, we’ll take a closer look at what to look for when shopping for home studio equipment, especially when it comes to figuring out which components you’ll need, how they interact together, and what specs you actually need to pay attention to (and which aren’t as important to get started). Yamaha has been kind enough to loan us a number of products from their professional audio range, which we’ll be incorporating into our series as we go – including a Steinberg UR44 USB audio interface, several sets of headphones, including the HPH-MT7 (as well as the MT8’s) and a pair of their legendary HS8 powered studio monitor speakers. Let’s begin by looking at the most important areas of home recording studio equipment.
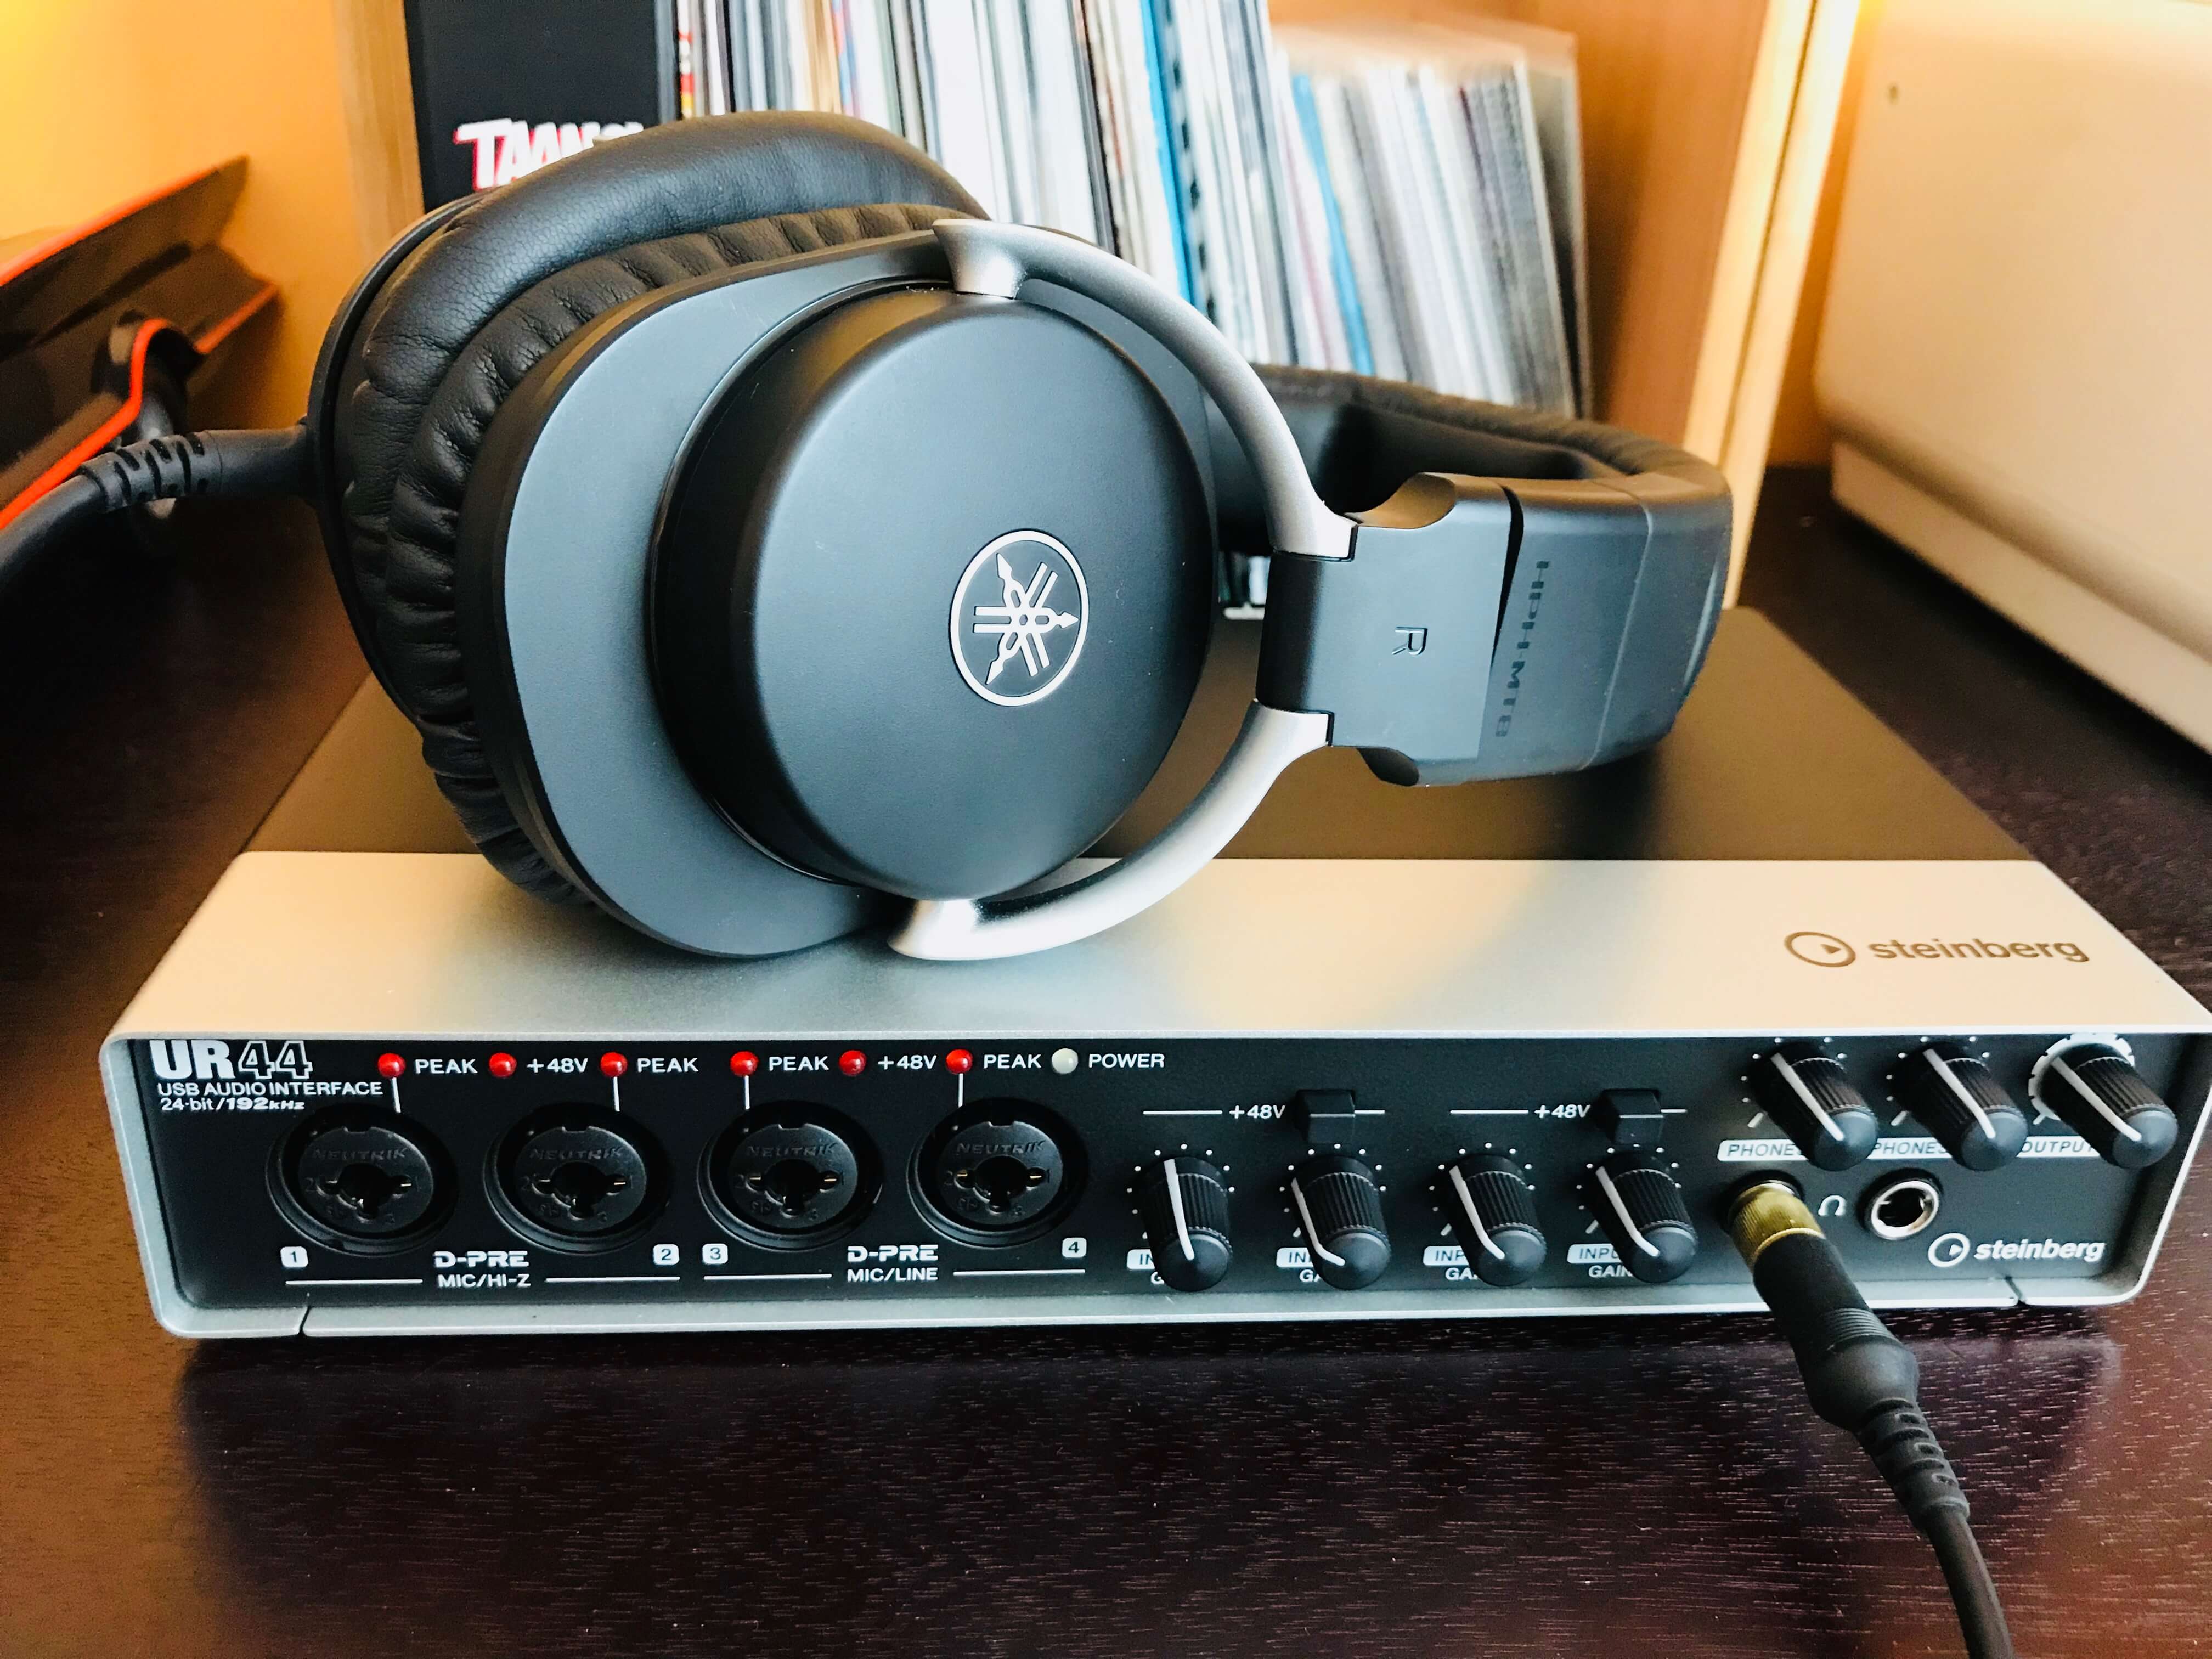
Steinberg UR44 USB audio interface
ANATOMY OF A HOME RECORDING STUDIO SETUP
Recording studios have come a long way since the days of multi-million dollar complexes with 30-foot long consoles and flying faders. It’s now possible to record professional-quality albums at home, with gear that costs a fraction of what those old commercial studios paid. With that in mind, let’s break down the essential equipment you’ll need to get your own home recording studio up-and-running.
HOME STUDIO COMPUTER (CPU)
The computer is the heart of the modern-day recording environment, whether it’s a six-figure studio or simple bedroom rig. Our recommendation is to get the most processing power and RAM your budget allows for – trust us, you’ll need it. Your DAW and plug-ins (more on those below) have the capabilities to eat up CPU power and memory at an alarming rate. And don’t skimp on the sound card (for obvious reasons), if possible. You’ll also be well-served to invest in an external hard drive for backup storage in addition to a cloud-based storage system for redundancy purposes (in other words: you’ve worked hard, so safeguard yourself from lost data!). Another element of the computer setup that many home users neglect, at least to start, is a powerful GPU (graphics processing unit), which may allow you to extend your desktop to a pretty elaborate multiple-monitor configuration, if your built-in hardware does not already allow for this. More monitors mean more screen real estate, and if you plan on tracking and mixing a lot of channels in your projects, spreading them out can make the process a whole lot easier to see at once.
DAW & SOFTWARE PLUG-INS
Great, you’ve got a tricked-out computer system all ready to go. Of course, the next step is to get set up with a DAW (digital audio workstation), the software you’ll be using to record, mix and edit your tracks. Along with your DAW, you should also research what audio plug-ins and software effects you may wish to use for your projects. Plug-ins extend the capabilities of your recording software, and may mimic external hardware devices you’re familiar with like modulation effects, guitar cabinet simulators and reverb units.
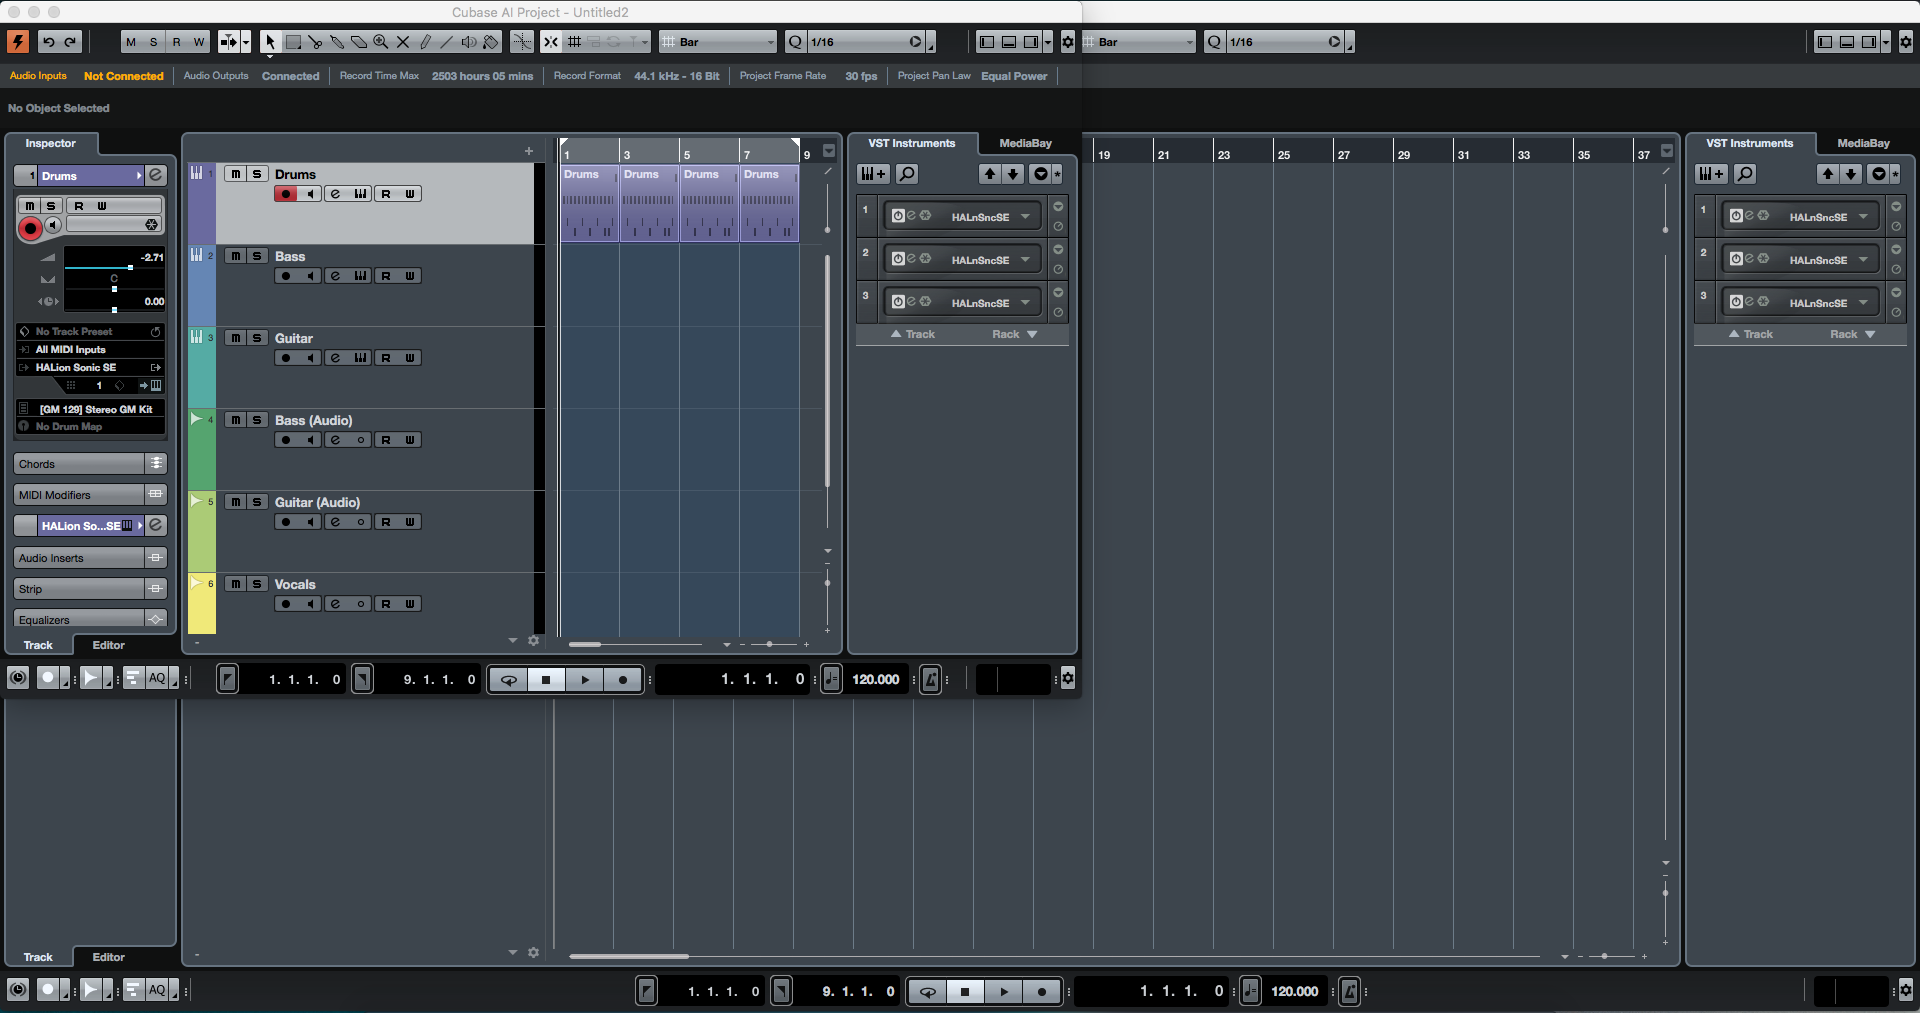
Steinberg Cubase AI project
Your DAW is going to be where you spend the majority of your time during your sessions, so research a few different options to see what’s available. The Steinberg UR44 USB audio interface we’ve set up (more on interfaces below) comes with Cubase AI. Cubase is a popular and easy-to-use piece of software that would make an excellent choice for anyone looking to get into home recording. Arming tracks to record, editing tracks and mixing them together is fairly straightforward, and adding your own plug-ins or using some of the add-ons included in the package is a breeze. As a bonus, Cubase works seamlessly with the entire range of Steinberg interfaces, making for a tightly-integrated recording ecosystem sure to take the hassle out of setting up a studio rig for the first time.
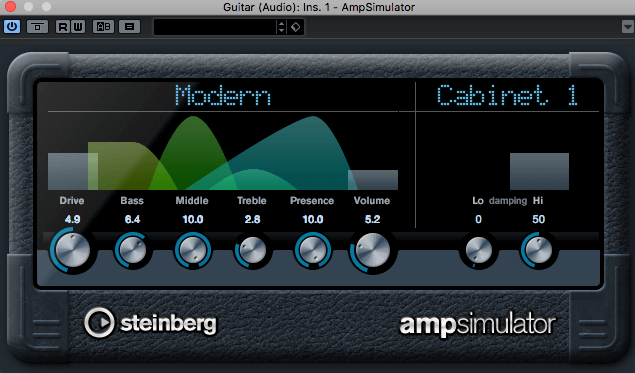
Steinberg Amp Simulator
MICROPHONES AND CABLES
Depending on your needs, there are a wide variety of mics to consider for your home studio (dynamic, large diaphragm condenser, small diaphragm condenser, USB mics, etc.) – each of which will require (typically) XLR cables. Increasingly, we are seeing more high-quality digital mics with USB and even Thunderbolt connectors, which makes direct hookup to your Mac or PC (and now mobile devices) a snap. Without quality mics to capture the sound of the instruments and vocalists you wish to record, your mix is doomed from the start. What’s the old adage? Garbage in, garbage out…
USB AND THUNDERBOLT AUDIO INTERFACES
Even the best mic in the world is useless if you can’t get the sound it picks up into your system. In order to actually get audio (and MIDI) signals into your computer, your guitar cables, DI lines, MIDI controllers and microphone cables all need to go somewhere. That’s where an audio interface comes into play. This unit connects your audio and MIDI sources to your computer, typically featuring a combination of mic preamps with analog-to-digital convertors, DI inputs, monitor controls, headphone ports and gain adjustments. We mentioned the Steinberg UR44 above – this USB interface features 4 mic inputs (mic pres), phantom power for condenser mics, front headphone jacks, MIDI in and out, plus rear outputs for powered studio monitor speakers. A setup like this provides everything a home recording studio would need to get started, and as you require more inputs, you can graduate to more advanced systems. But to begin with, a unit like the UR44 is an incredibly powerful and easy-to-use option that will get you ready to begin recording, right out of the box. Just plug in your new interface via USB, configure your DAW to recognize the unit, plug in your mics or instruments and hit ‘Record.’
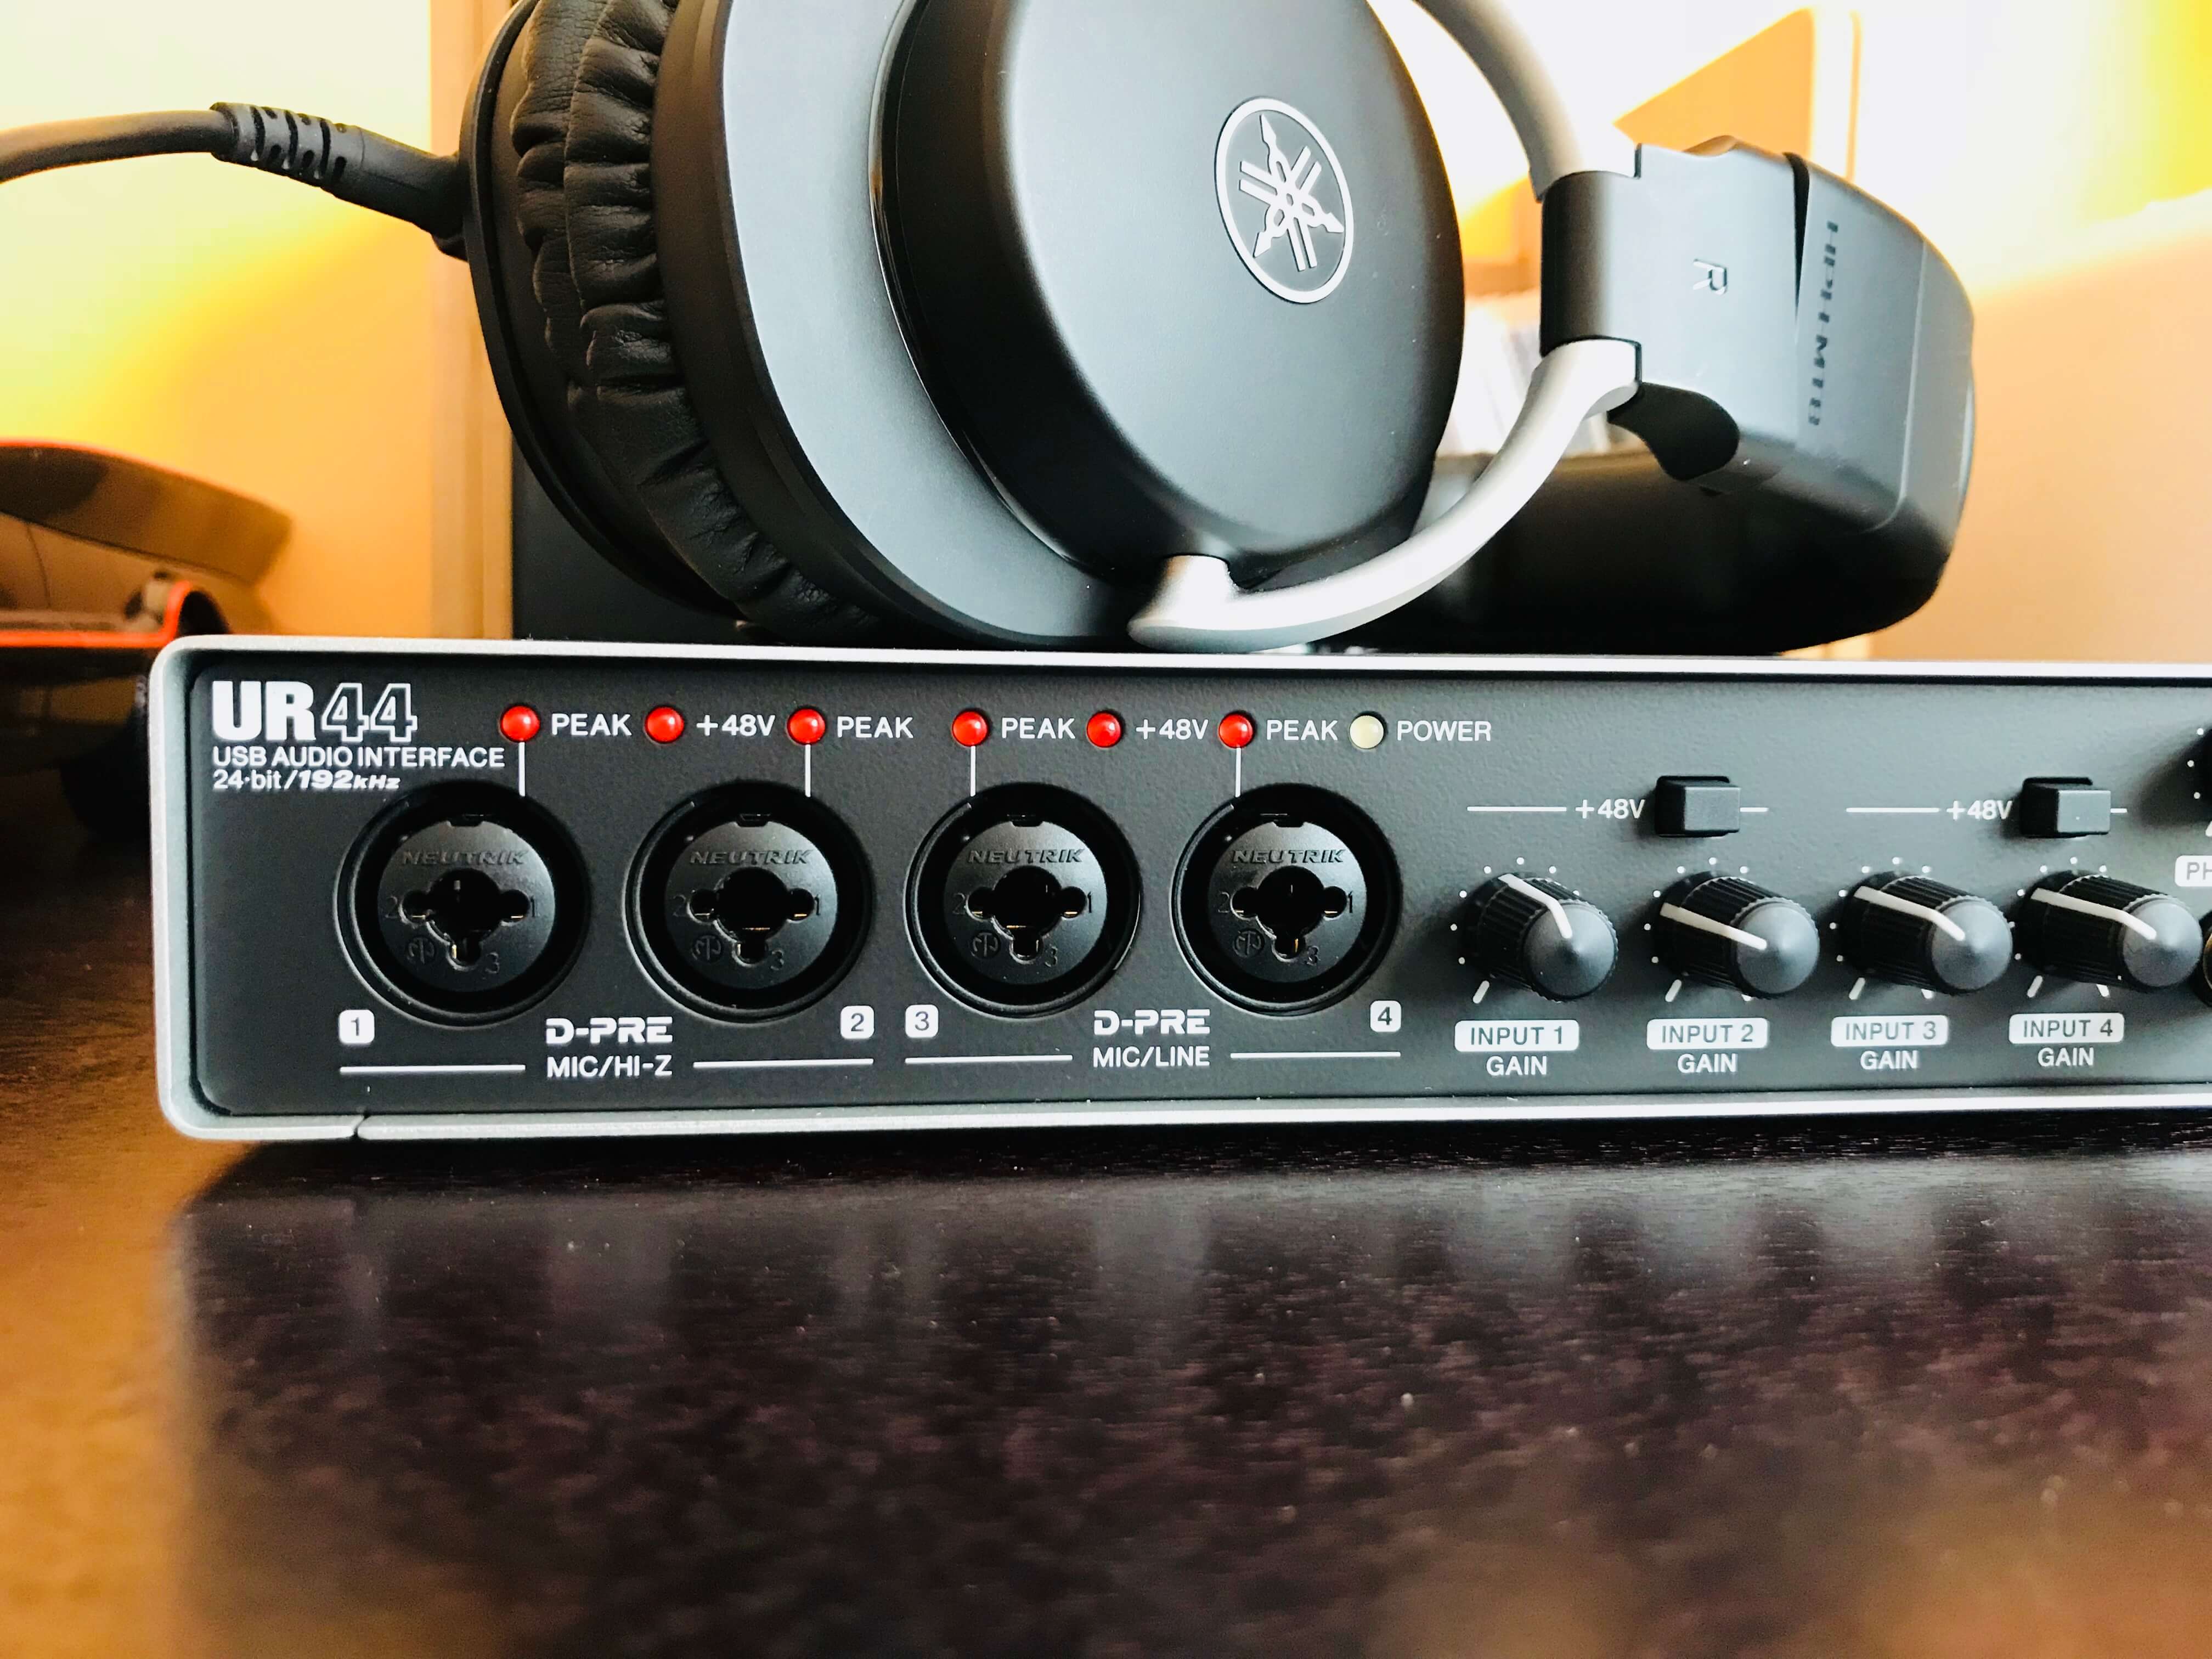
Steinberg UR44 USB interface closeup
CONTROL SURFACE FOR YOUR DAW
Sure, you can sit there with your mouse and keyboard and try to control your mix “in the box,” so to speak, but it’s typically easier (and more fun) to feel tactile controls under your fingers. Control surfaces take the pleasure of mixing with physical faders and knobs and turn that into a practical solution for home studios. Control surfaces have come a long way in recent years, and work with most major DAWs and operating systems. If you want to be able to control your sessions in a more traditional manner, your control surface may become the most indispensable tool in your home studio arsenal. These units don’t transmit any audio signals, rather they typically operate by sending MIDI data to your computer that, in turn, tells the on-screen controls what to do. Most units will also enable you to map certain features to some or all of the physical controls, for greater customization of your workflow. Most first-time home recording studios overlook this bit of hardware when first getting set up, and our advice is to not make that mistake.
MIDI CONTROLLERS
If you’ll be using virtual (software-based) instruments as part of your setup, investing in a good MIDI controller or synth that doubles as a MIDI controller is going to be essential. The good news is that most audio interfaces and DAWs are already set up to handle MIDI in/out and editing. And if they don’t have MIDI I/O (luckily our Steinberg UR44 does), most modern-day MIDI controllers and synths with MIDI allow for MIDI-over-USB, meaning you can bypass an audio interface completely and connect directly to a computer. Now, the reason we mention synths is that while you can certainly buy a MIDI controller on its own (say, a MIDI keyboard with a few octaves of range), those devices only do one thing: transmit computer data to your DAW. That’s great and all, and you can obviously command entire symphonic performances from such devices, but if your budget allows, it might make more sense to purchase a synthesizer that also can act as a MIDI controller. That way, you get the great sound of the synth in question, plus the ability to use it to transmit and (in many cases) receive MIDI data to and from your DAW. One of our favorite lineups of the past few years is the Reface Series from Yamaha. Consisting of four great synthesizers (our fave being the Reface CS), each one doubles as a handy, portable USB MIDI controller.
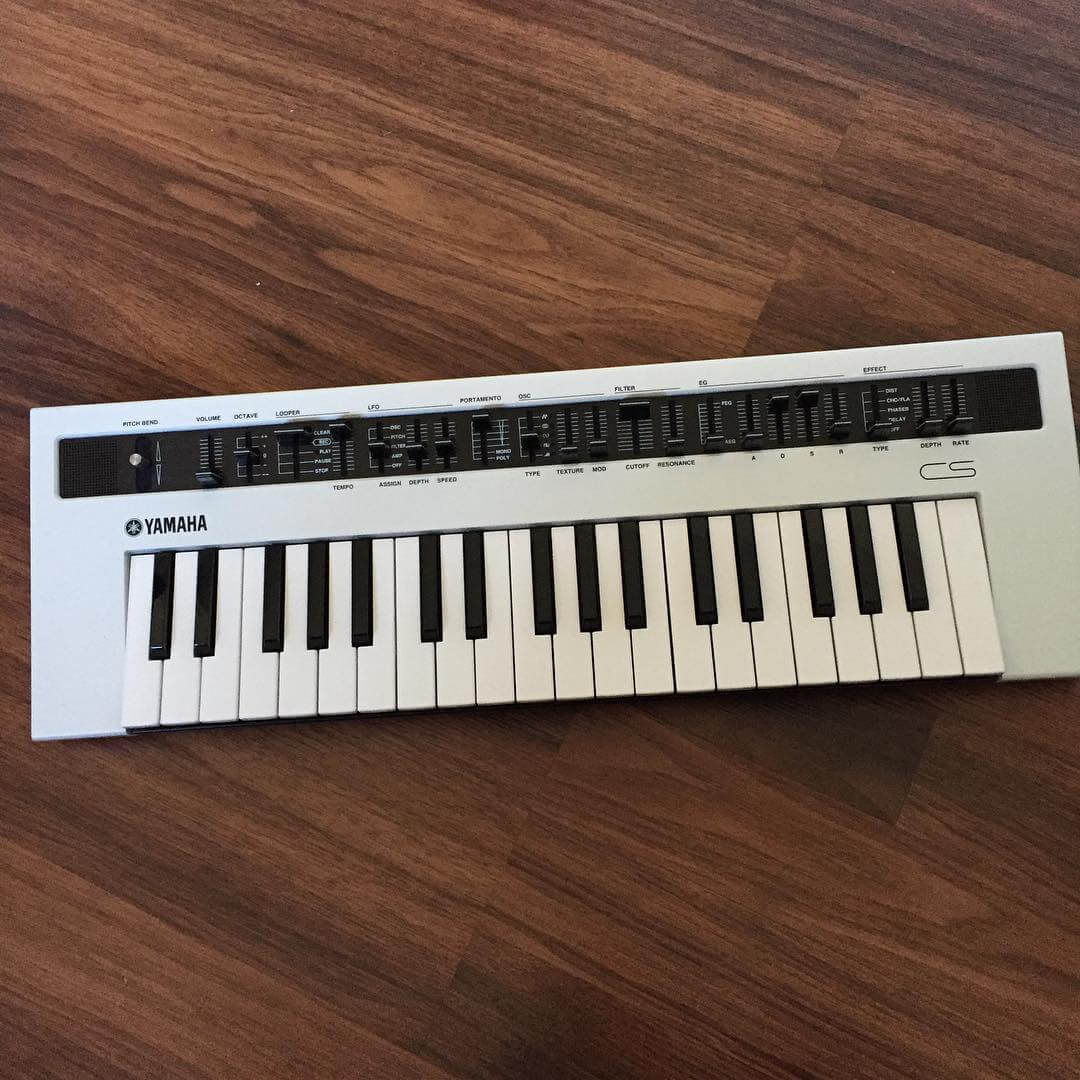
Yamaha Reface CS synthesizer and MIDI controller
STUDIO MONITORS
What good is mixing a song if you’re not hearing it properly? Unlike consumer hi-fi speakers, which often color the sound to make for a more pleasant listening experience, Studio Monitors often offer a FLAT frequency response, which ensures that your mix will sound great on virtually any system. For years, the go-to for home recording studios and commercial studios alike have been Yamahas. You’ve probably seen the classic white speaker drivers in countless photos and videos. We’ve been testing out the HS8 8” powered monitors, and the legendary sound Yamaha is known for comes through loud and clear during tracking and mixing. Our recommendation is not to skimp in this area – hearing your mix through pro-level monitors will be crucial when it comes to crafting the right sound for your project. The HS8’s offer additional controls for high trim and for compensating for your room environment. These features can make the difference when it comes to producing your project the right way.
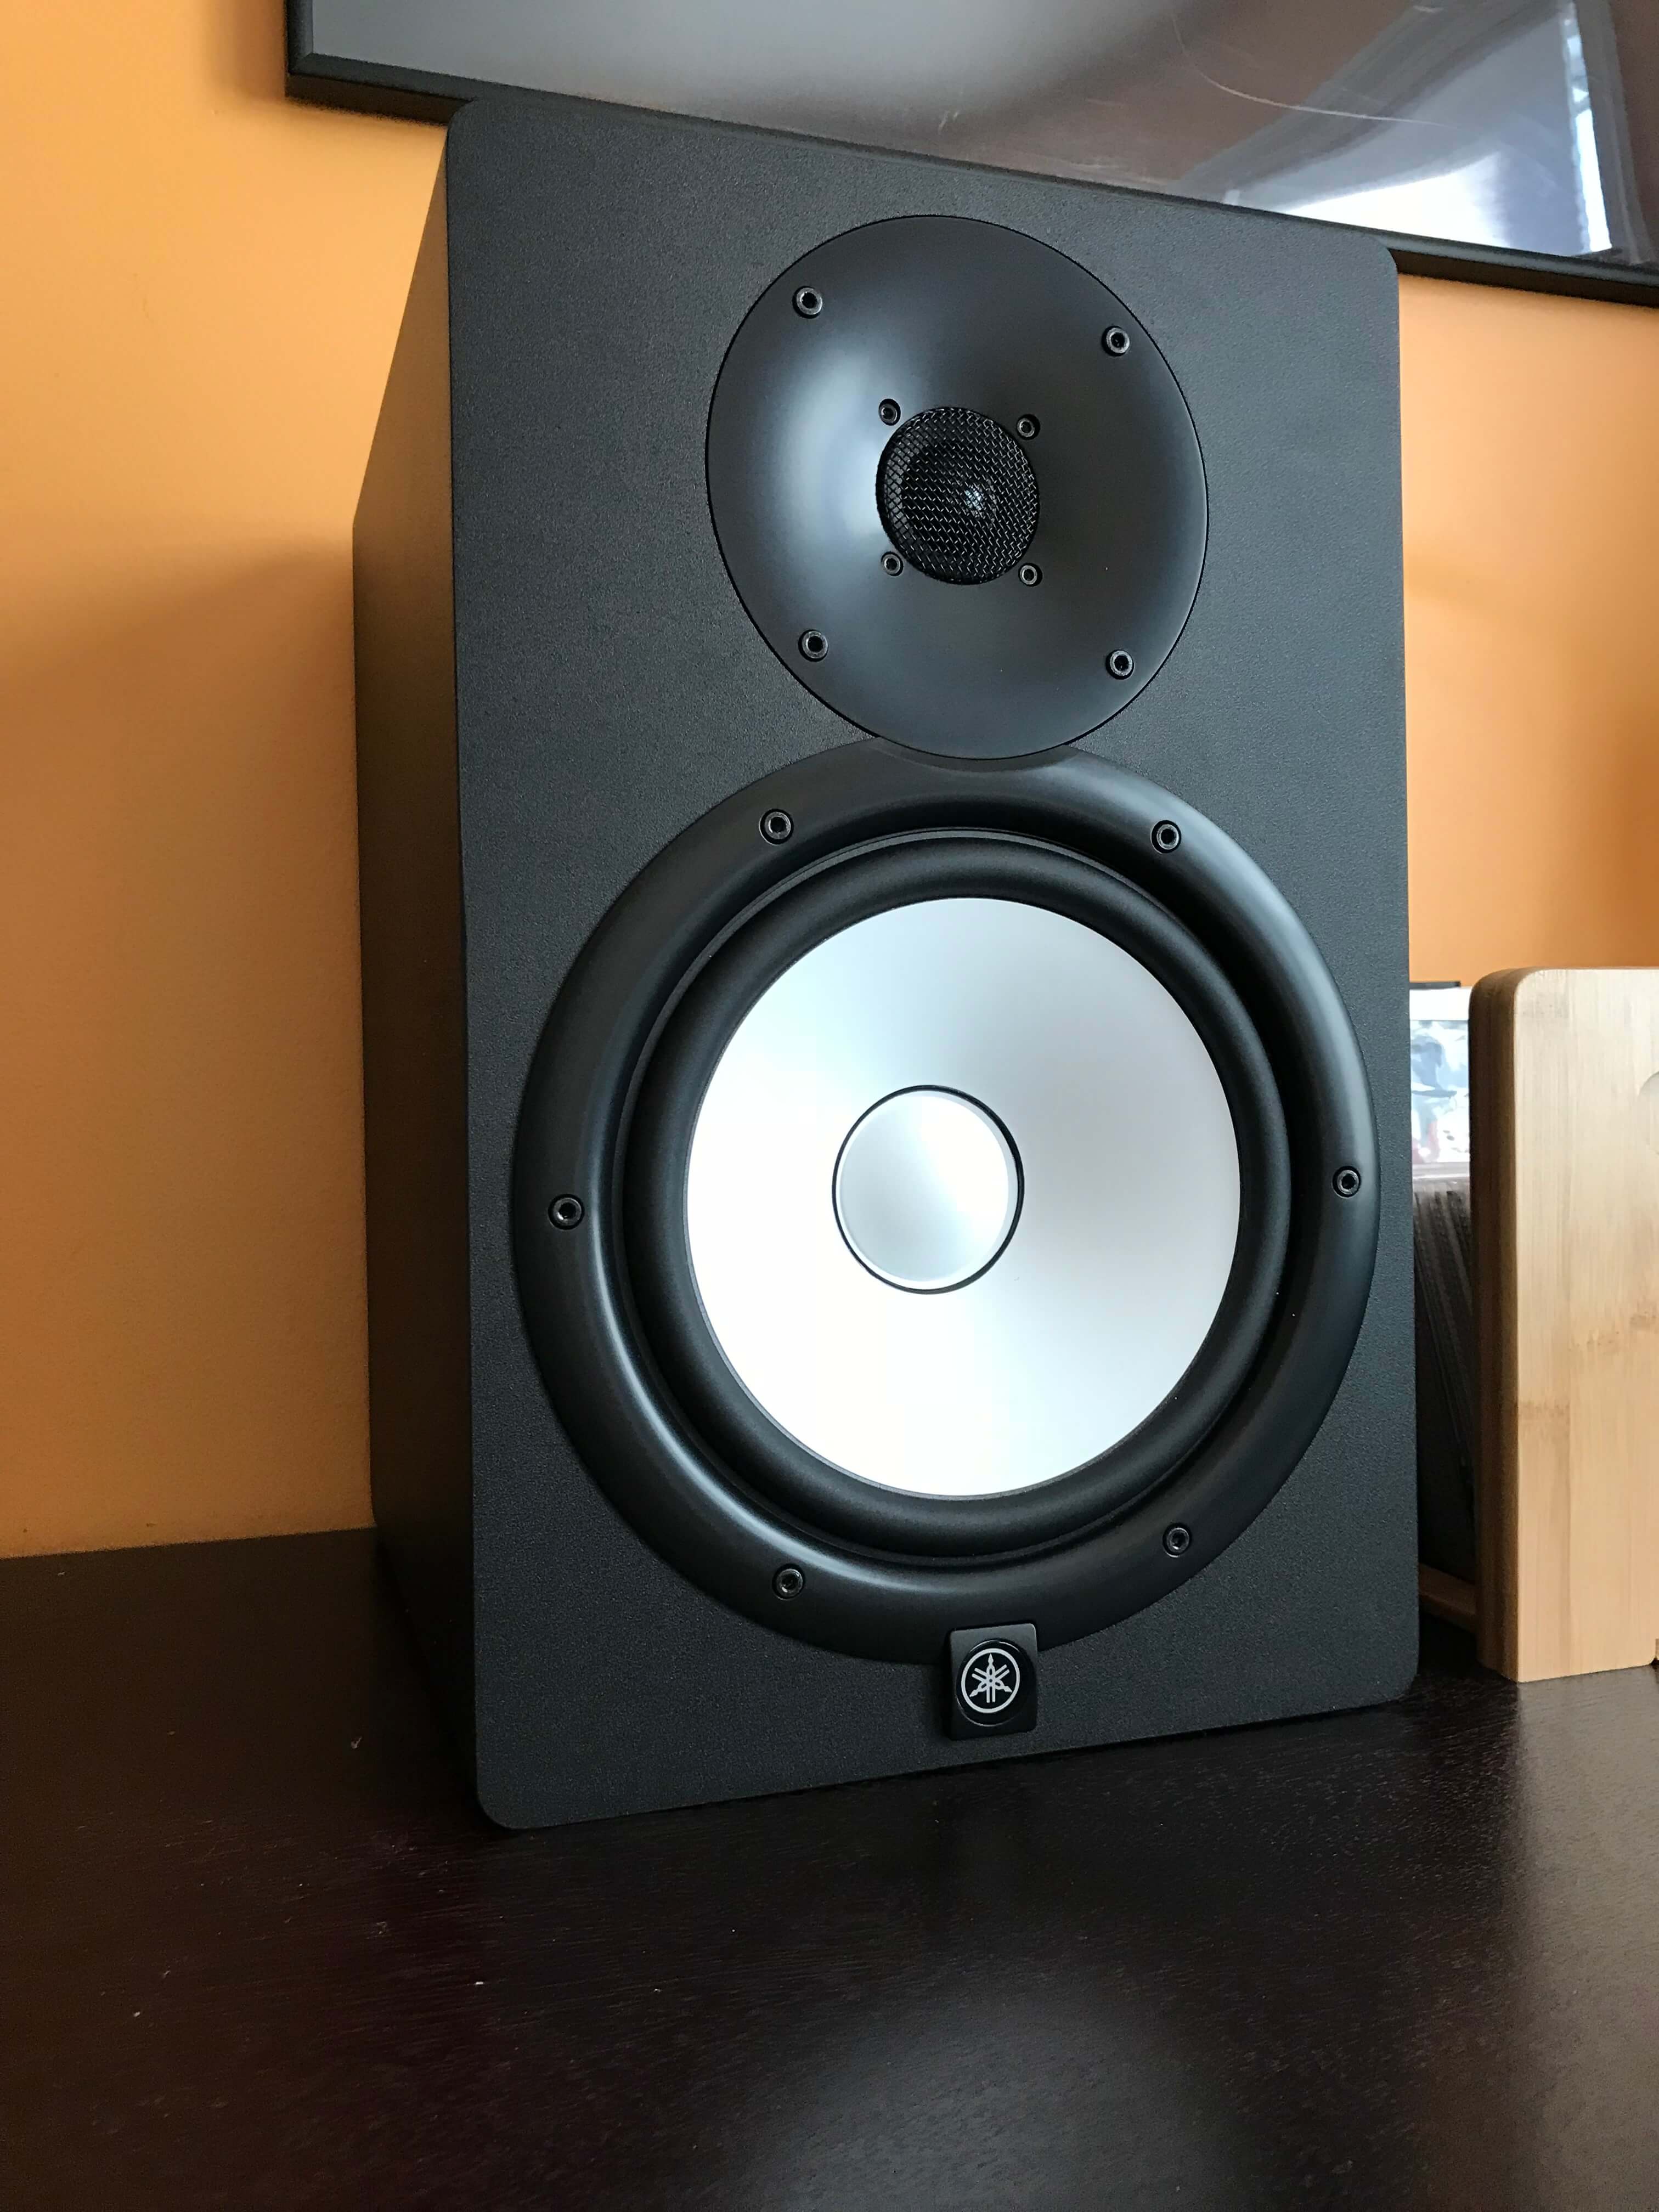
Yamaha HS8 monitor speakers angle
STUDIO MONITOR HEADPHONES
Of course, you’ll also want to test your mix on headphones, to really hear all the nuances you’ve created. We recommend a pair of good closed-back studio monitor headphones so you can test your tracks without room bleed and ambient noise leaking through, as you’d get with open-back headphones meant more for hi-fi listening. By now, you probably won’t be surprised to find that Yamaha has got you covered here, too – we’ve been regular users of the affordable HPH-MT7 headphones for more than a year, as well as their big siblings the HPH-MT8’s.
CLOSING THOUGHTS
Now, keep in mind these are the basics you’ll need to get started. For a more serious rig, you can also add a dedicated uninterrupted power supply (UPS), outboard effects, 500-series chassis and modules, power conditioners, soundproofing, acoustic panels, diffusers, and lots more goodies. Head to https://usa.yamaha.com/products/proaudio/index.html to learn more and to find the products that will fit YOUR home studio needs.
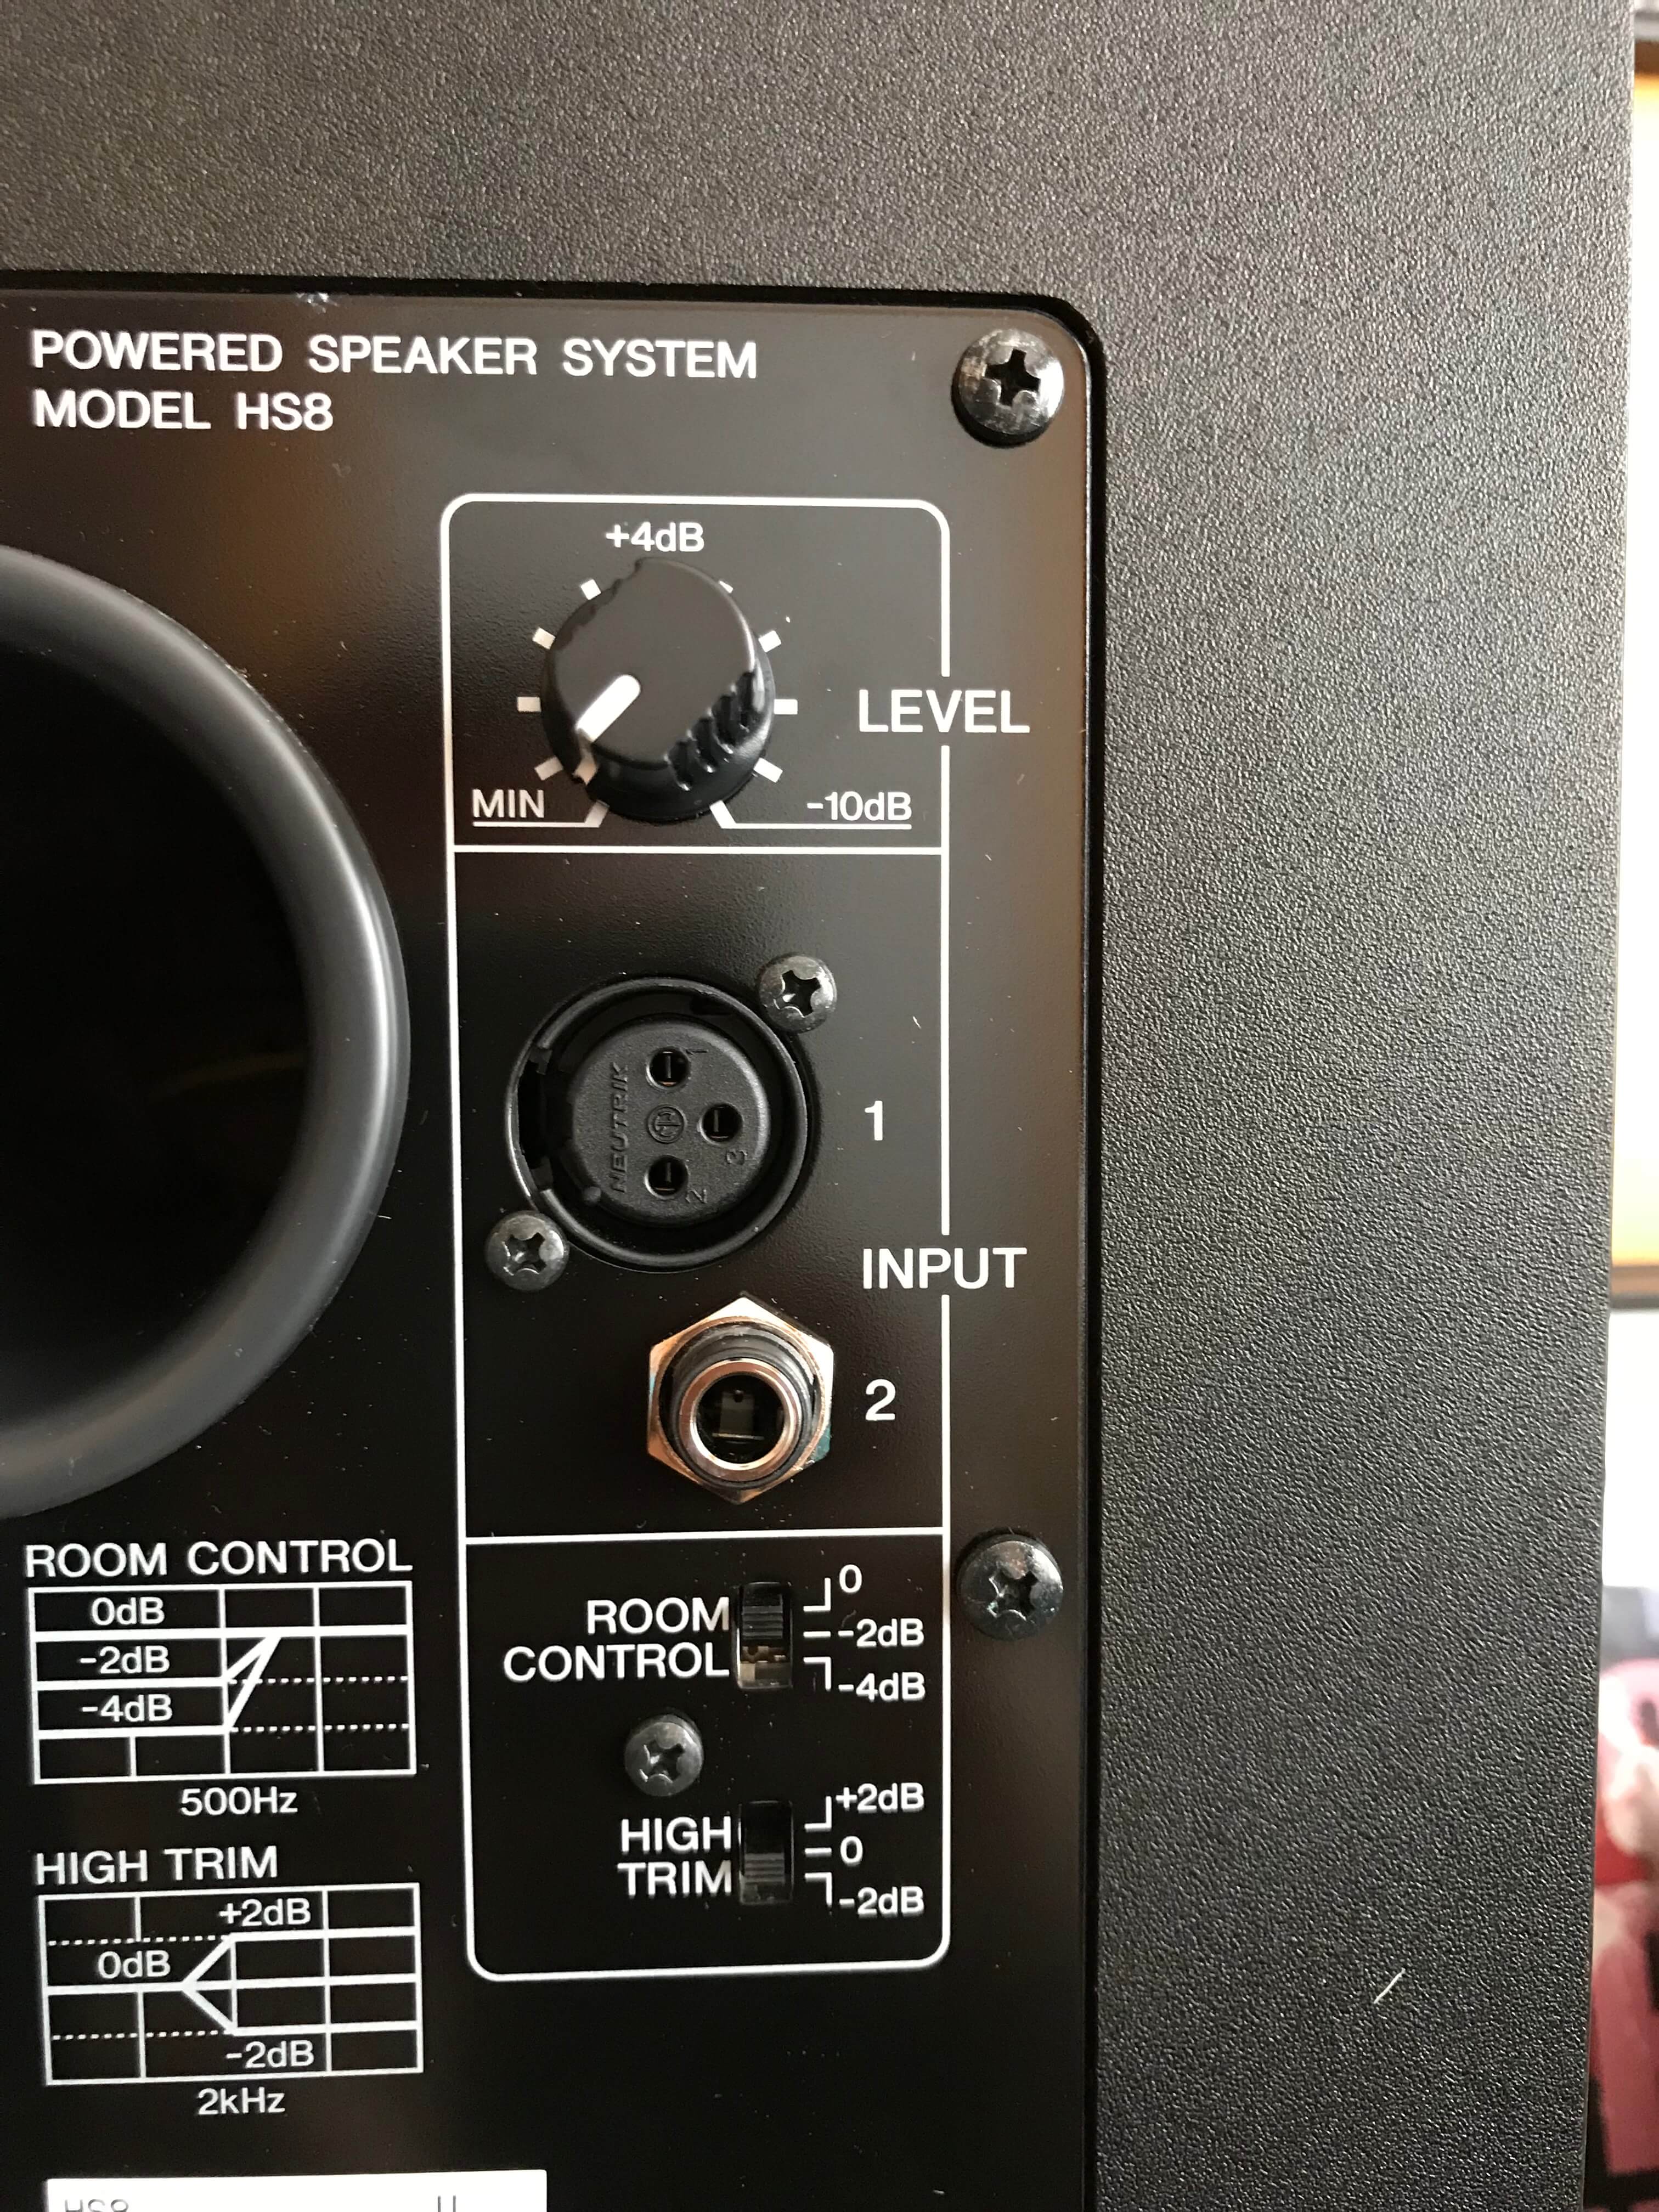
Yamaha HS8 monitor speakers rear
We hope this installment gets you on your way to purchasing the besr equipment for your home recording studio needs. Stay tuned for upcoming parts of the series that will focus further on choosing the right audio interface, mixing with studio monitor headphones and setting up studio monitor speakers in your home recording studio setup. Until then, be sure to check out the entire range of Yamaha professional sound products here and follow Yamaha Music USA on Facebook and Twitter.