A Non-Scary Intro to Eurorack
AKA Modular is Not a Dirty Word
Hello, my name is Quinn, I make music under the name Wyram, and I love working with Eurorack Modular Synthesizers. Not only do I think Eurorack modular manufacturers are creating some of the most interesting music technology of today, but I also find that using them leads you to creative decisions about music you otherwise wouldn’t have ever explored. If you’re interested in getting into modular synthesis, but the thought of keeping track of that many patch cables scares you a bit, fear not! This guide should help you get on the right track to building your first modular system.
How does a Eurorack system work anyway, you might ask?
Well, the biggest difference between modular systems and regular hardware or software is that you won’t be able to make any music with them right out of the box. Your system will be made up of individual modules that need to be mounted in a case with a power supply, and you have to physically create the signal flow for both audio and control sources manually with patch cables. The modules can range wildly based on their functionality, with some of them converting MIDI messages to control voltage or converting your signal to a line-level output, to traditional synthesizer building blocks like oscillators, filters, and envelopes, to bizarre devices like probabilistic sequencers and bioelectricity interfaces. The biggest advantage of working with a modular system is because you can reconfigure the signal flow however you like, you can alter the sounds and functionality of your system drastically all while using the same set of modules.
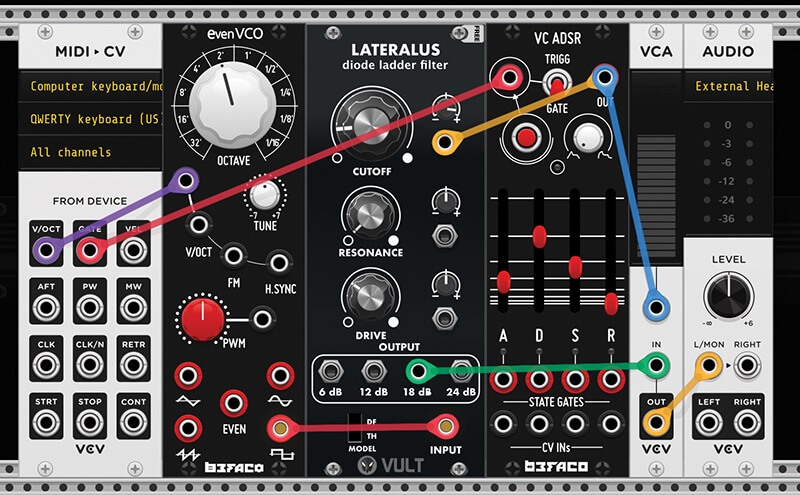
The main thing to remember about modular systems is the difference between control voltage signals (and the various types of them) and audio signals. Let’s imagine a simple system with a MIDI to CV interface, oscillator, filter, voltage-controlled amplifier, envelope generator, and an output module. The MIDI module will at the very least have an output for pitch (usually labeled 1volt/octave) that you’ll need to patch to the pitch input on the oscillator, and one for gate messages (whether the note is on or off) that you’ll want to patch into the gate input of the envelope generator module. Your oscillator might have a single audio output jack, or separate ones for each waveform it can produce, but you’ll have to patch one of these to the audio input of your filter module, and then out of the filter into the audio input of your VCA, and again out from there into the input of your output module to convert it to line level. There are just a couple more things to patch to get sound to come out of your system, which are patching the envelope output of your envelope generator into the CV inputs on both the VCA and filter module. Now, your gate signal has been converted into a more complex envelope shape, and you should be able to play the mono synth you’ve just built!
Now that I’ve introduced you to how it all works, here are the steps that I’d take if I were starting my modular journey today:
Step 0: Try a software emulation first.
VCV Rack 2 is the one that I use most often, and it just so happens to be mostly free! There are other popular emulations like Voltage Modular and Reaktor Blocks you can try as well. I call this step 0 because it’s a low-stakes way to begin to wrap your head around the workflow of modular synthesis, so you can see if it actually works well with your creative process before making the financial investment of building a hardware system.
The software emulations can technically be even more powerful than a physical system, but so many people choose to build hardware systems because physically interacting with them is such a big part of the experience (and it’s certainly more pleasant that navigating one with a mouse and keyboard).
Step 1: Choose a purpose for your system.
The most important question you want to answer when diving into Eurorack is; what’s the purpose of my modular system? Are you trying to build a fantastic sounding mono synth with tons of modulation options? Are you creating a custom groovebox or performance-oriented sequencer/synth combo? Are you making a sound design station to discover new tones? Or are you making an infinitely generative ambient machine to be played by mushrooms? If you can answer this question as specifically as possible, you can choose your modules with a sense of purpose and efficiency. I wouldn’t suggest picking all of the modules you want to use quite yet, because you have to make sure you have enough room in your case for them, but I would definitely look into your options in order to build your system. If you also want to keep your budget in check for your first system, you can still find a ton of awesome but inexpensive modules from manufacturers like Ladik.eu, Tesseract Modular, Blue Lantern, and Doepfer.
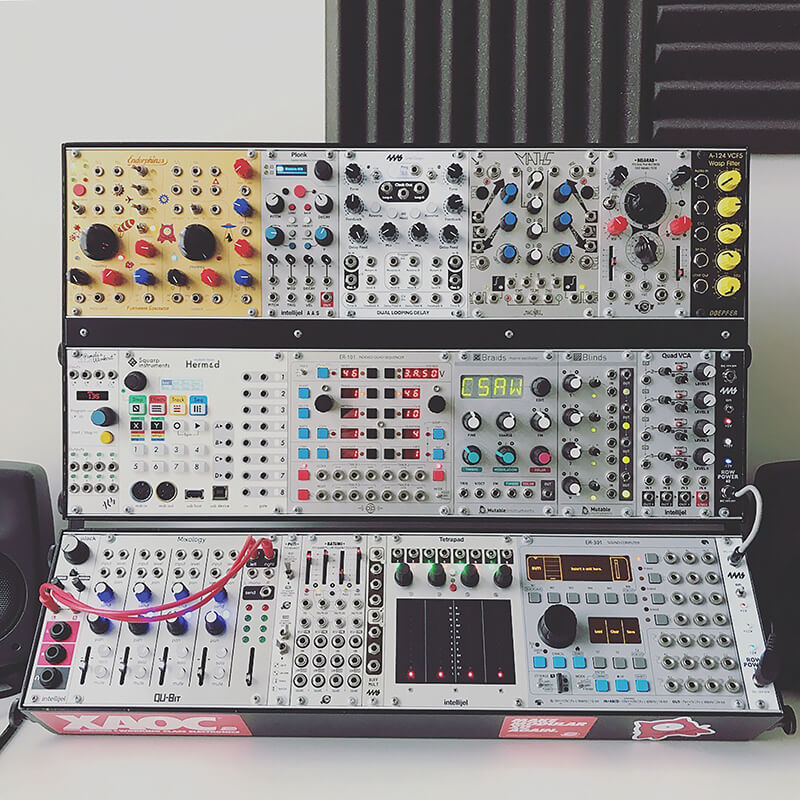
modules by Matt Biddulph
Step 2: Choose a case.
Eurorack cases present your first big financial investment, but there are a ton of reasonably priced options to get your foot in the door. The biggest thing to consider when choosing a case is its size, which in Eurorack terms is measured in HP (width) and U (Height). You probably noticed that Eurorack modules come in only two heights (3U and 1U) but can vary wildly when it comes to width (anywhere from 2 HP to 64 HP), and that cases can be as small as a single 3U row with 84 HP up to monster 21 U walls. Fortunately, there are a good number of inexpensive starter options available these days, like the Intellijel 4U Palette Case, Tiptop Audio Mantis, or Crea8 Audio Nifty Case, which are all great starter options because of their built-in power supplies, and in the case of the Palette and Nifty Cases their built-in utilities for things like MIDI and audio outputs.
Step 3: Plan things out first using Modulargrid.net.
This website is one of the best resources out there for building your own modular system, because it lets you make sure the modules you want will actually all fit in the case you’ve chosen, as well as making sure your modules don’t exceed the limitations of your power supply! You can create a virtual representation of whichever case you’ve purchased, and then fill it up with the website’s database of nearly every module ever created using the super flexible search function. Be aware that some of the modules you’ll find on modular grid are discontinued or not yet available, so you may have to do some editing based on what you’ll actually be able to get your hands on.
Step 4: Don’t forget accessories.
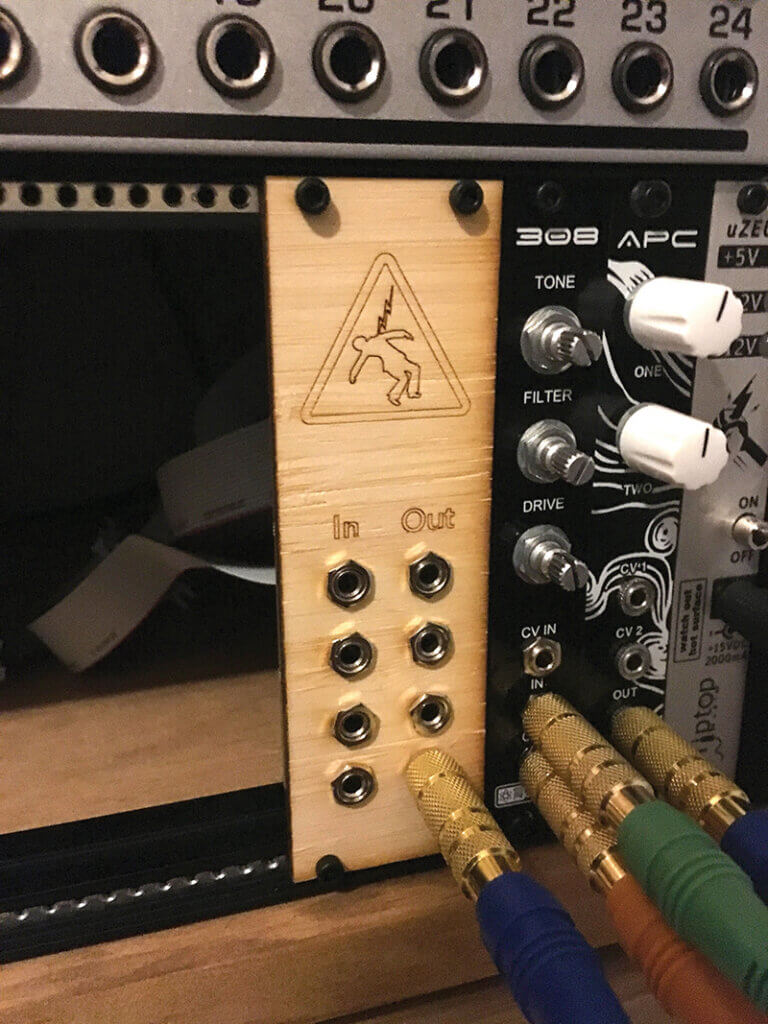
This one might seem obvious, but you’re going to need patch cables for your system, and probably a lot more than you think. It’s also pretty important to get a lot of cables of different lengths to actually reach modules that are far from each other, or not to get in the way of the knobs and switches of modules that are closer. You might also want to grab a few stackable cables and splitters, especially if you didn’t have room for enough mult modules in the system itself. Also, if you want the whole thing to be portable, a bag or road case that fits your system definitely can’t hurt!
Eurorack by Paul Anthony
ADDITIONAL HELPFUL RESOURCES:
https://www.tesseractmodular.com