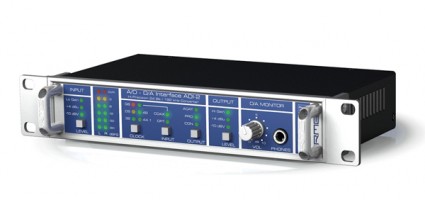
Converters
A converter will have a few things you’ll need to take into consideration when processing data. Resolution directly corresponds to the bit depth, which is the number of bits per sample. The sample rate will judge how quickly the “digital snapshots” are taken. The Nyquist Theorem explains more in depth the reasoning behind sample rates and conversion. Total harmonic distortion (i.e., the amount of distortion and noise introduced by the converter), is shown as a percentage of the total power that will impact the dynamics of the signal flow.
-Dynamic Range
The dynamic range of the units will indicate the amount of difference between largest and smallest signals. Dynamic range is directly related to the bit depth and the resolution of the converters and will be indicated as decibels on most units.
-Quantization Errors
The amount of difference between the source and the converted signals is referred to as quantization errors. Most converters will come with some sort of dither built-in to help avoid this. Dither will add random low-level white noise, helping to offset the quantization errors. This will shape the signal, keeping it as close to the original as possible.
-Anti-Aliasing
Anti-aliasing will correct any errors between the input and the output by using a low pass filter that will rid the signal of everything above one half of the sampling rate. The converter will look at the signal as it passes through the converter; if the values suddenly change between the input and the output, this is called aliasing. These values, by most converters, are considered invalid.
Clocks
Many converters come with some sort of clock built in, which will aid in syncing multiple units together. Assuring that they are always operating at the same speed will save time and syncing headaches. As with most things, the more inexpensive units will cut corners to save money and clock precision will suffer. Clocks are certainly not a glamorous item to add to a studio arsenal, but are completely necessary to make sure that all units are functioning on “synced” time.
-Jitter
Clock jitter or phase noise is one common occurrence among cheaply made clocks, so making sure that converters and other digital units are punctual with their calculations will require that a clock is ultra low/no jitter. The ultra low or no jitter clocks can be costly in comparison, but they will provide the most solid and trustworthy syncing of all units in the studio.
A clock can also impact the converter by causing errors. When these errors are introduced, usually due to an inconsistency in the sampling time – the input creates errors in small amounts. At lower frequencies, more significant errors will be produced, especially in high frequencies with louder amplitudes. The anti-aliasing has filtered the frequency’s half of the sample rate. So it’s not the frequency that the clock is set to that is affecting the jitter, it is the frequency’s half of that which affects the converter. This is why a good clock is necessary.
Typically, clocks will hook up via a BNC connector, which will pass the signal down a coax cable. If an external clock is being used, for example in Pro Tools, there are a couple of things that will have to be set to assure the external clock is set to properly sync the software. First, in the hardware setup menu, set the clock source to “word clock.” The “word clock” selection will assure Pro Tools is controlled by the external word clock. Next, go the session setup page. Here the clock source will be selected.
When looking to upgrade, take the time to do the research. Make sure that the converter or clock will interface with your DAW, and that it will perform at the desired level with the desired capabilities (i.e., sample rate, on board dither, etc…). If it has an onboard clock, make sure that it is no/ultra low jitter. Otherwise, it will have to be controlled externally by a better clock to assure accurate results, which will in turn cost extra money.