In an earlier article I covered the basics of using Reaper. This article will cover how to setup a project template to streamline the recording process.
https://www.youtube.com/watch?v=LkmbKulqBj8
Project Templates have the following benefits
- Pre-built project folder organization
- Consistent look and feel
- Pre-setup FX routing
- Color-coded project folders (with SWS Extension add-on)
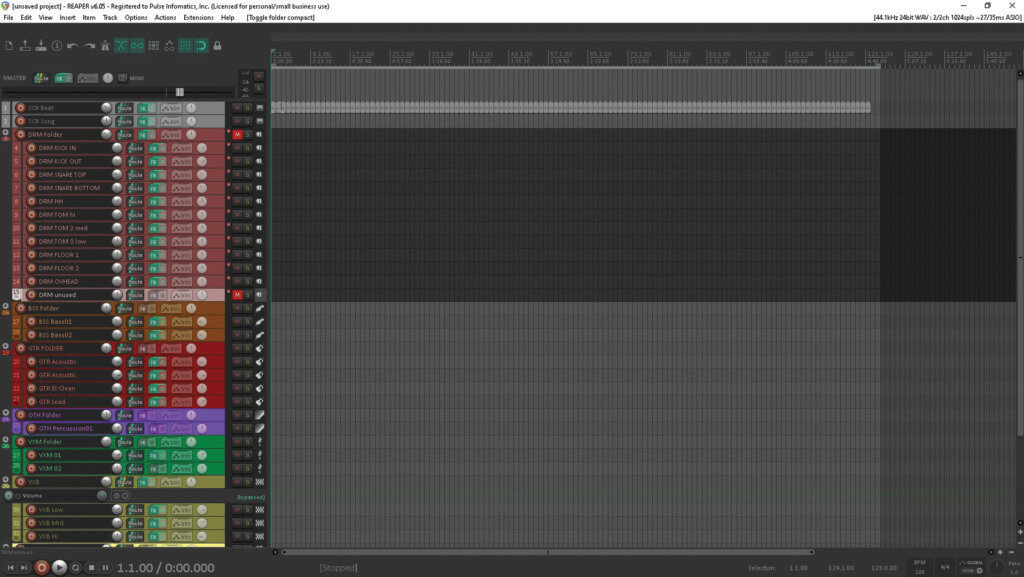
When I setup my project template I organize it in the following folders. I explain how folders work in Reaper below.
- SCRATCH Beat – MIDI Drum Click Track
- SCRATCH Song
- DRUMS FOLDER
- Kick in
- Kick out
- Snare top
- Snare bottom
- HH
- Toms (1-3)
- Floor (1-2)
- Crash
- Overheads
- BASS FOLDER
- Bass 01
- Bass 02
- GUITARS FOLDER
- Acoustic 01
- Acoustic 02
- Electric Clean
- Electric Distort
- Lead
- OTHER INSTRUMENTS FOLDER
- Keys
- Synth
- VOCALS MAIN
- ○ VXM01
- ○ VSM02
- VOCALS BACKING
- ○VXB Low
- ○VXB Mid
- ○VXBHi
- FX FOLDER
○ Compression - ○ Reverb
- ○ Delay
- XTRA TRACKS FOLDER
- ○ Unused or old tracks as archive
An example project template
Template Pre-requisites
While we are not covering in full the folder/track color coding included in my images, these are accomplished via the Reaper SWS Extensions – which can be download for free from: http://www.sws-extension.org/
Naming Conventions
I name my folders and the items within the folders using the following nomenclature.
SCR = Scratch Tracks. For example: SCR Beat is my MIDI Drum Beat that I use as a scratch track. SCR Song is my scratch track where I record the song – usually guitar and vocals, recorded to the beat in my SCR Beat track.
DRM = Drum tracks
BSS = Bass tracks
OTH = Other instruments. This includes keys, shakers, etc.
GTR = Guitar tracks
VXM = Main vocals
VXB = Backing Vocals
FX = Effects busses
XTR = Extra tracks I’m not using but do not want to delete yet. I move them here to get them out of the way and make navigating my project easier.
While outside the scope of this article, I use the above referenced SWS extensions to define track colors and icons. The colors and icons defined are based upon the track name prefixes listed above, making them even more useful as an organizational tool.
The following image shows the SWS Extensions Color & Icon Layout setup.
![]()
Once this is setup, I can add a track in the appropriate folder, name it, and select “Apply” on the above shown screen and the appropriate color and icon is added to the new track.
Let’s discuss folders and then create our folders and their tracks. In Reaper, there is no difference between tracks and folders. Any track can be turned into a folder by clicking the folder toggle.
Folders are tracks that have tracks indented below them. The folder serves as a master file for any audio tracks it contains. This allows you to apply fx, volume, and panning to an entire set of tracks in the folder, all at once.
An example of this is using a DRUM folder for all the drum tracks. Once you’ve mixed the drum levels to each other, you can increase or decrease volume of all the drums in your mix with a single control, or apply reverb to all the drums at once using the same parameters.
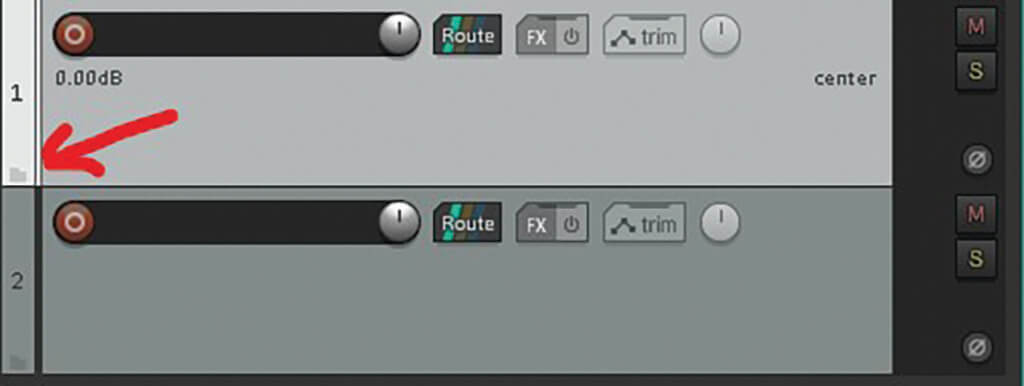
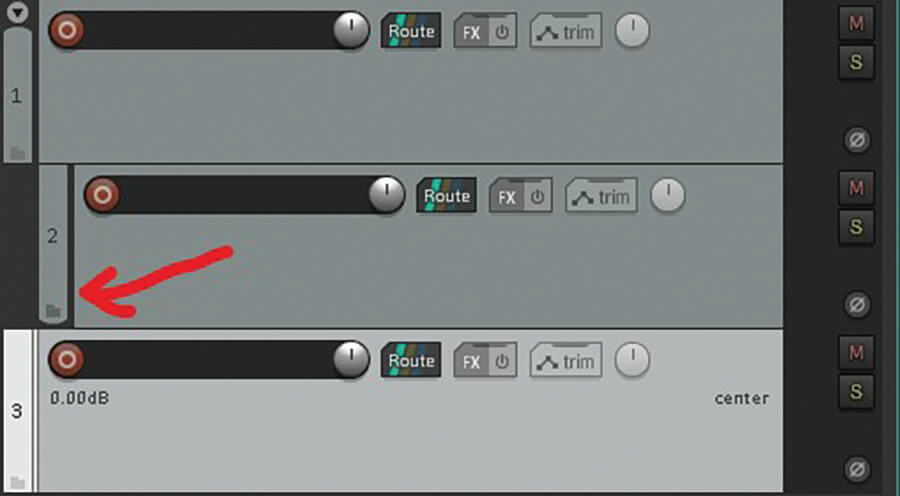
The following images show the effect of adding tracks and clicking on the folder toggle. Two tracks, no folders.
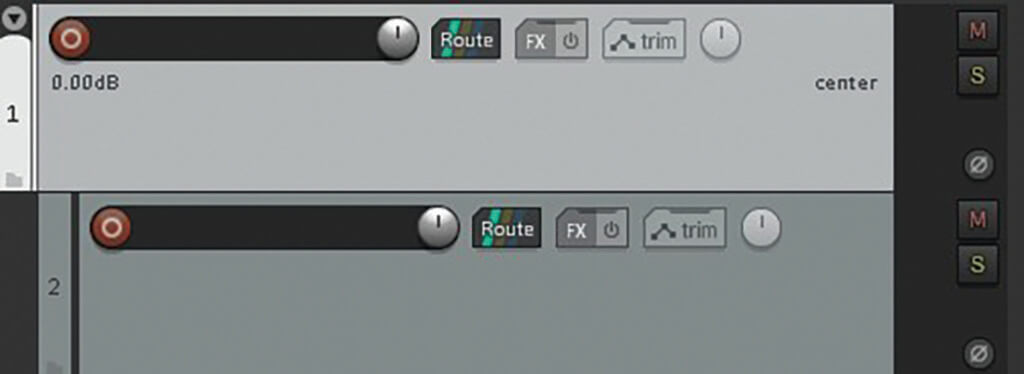
Folder track with indented sub-track
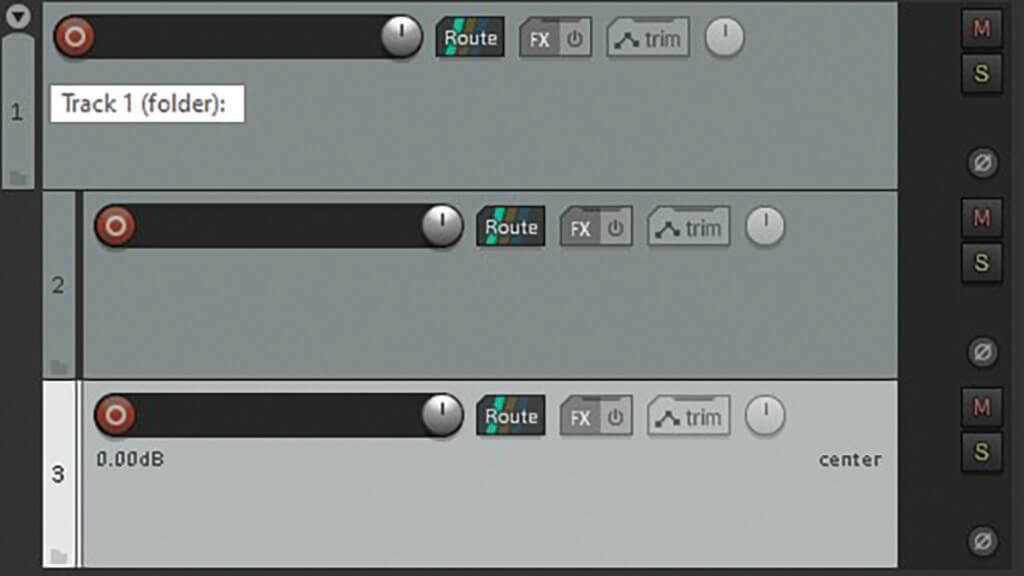
New track added, automatically indented
New track, indent removed by click prior track folder toggle twice.
Starting with a blank project
Click in the track area and add two tracks. Name the first, SCR Beat and the second, SCR Song.
I add a MIDI drum beat to the SCR Beat folder. I use this instead of a standard metronome click to add more feel when I am recording. I have a video online that demonstrates how to setup a MIDI drum beat as a click track.
Click to add a new track and name it DRM Folder. Add a track below it named DRM Kick. Now on the DRM Folder track, click the folder toggle once. You will see that the DRM Kick track indents, indicating it is a sub-track within the DRM Folder.
Now when you add a new track below it, it will automatically be indented and inside the DRM Folder. You can add tracks named DRM Snare, DRM Crash, etc. for any drums you may have mic’d up or will at a future date.
Add a new track for the Bass folder and name it BSS Folder. This will be indented because we are still adding tracks to the DRM Folder. Click twice on the folder toggle on the last drum track before the BSS Folder.
The first click will cause the track to be indented below the final drum track demonstrating that you can have folders inside of folders. The next click will cause the BSS Folder track to stop being indented, preparing it to be the next folder track.
Add two new tracks, BSS 01 and BSS 02. Click the folder toggle on the BSS Folder track, causing the two new tracks to be indented, as shown below.
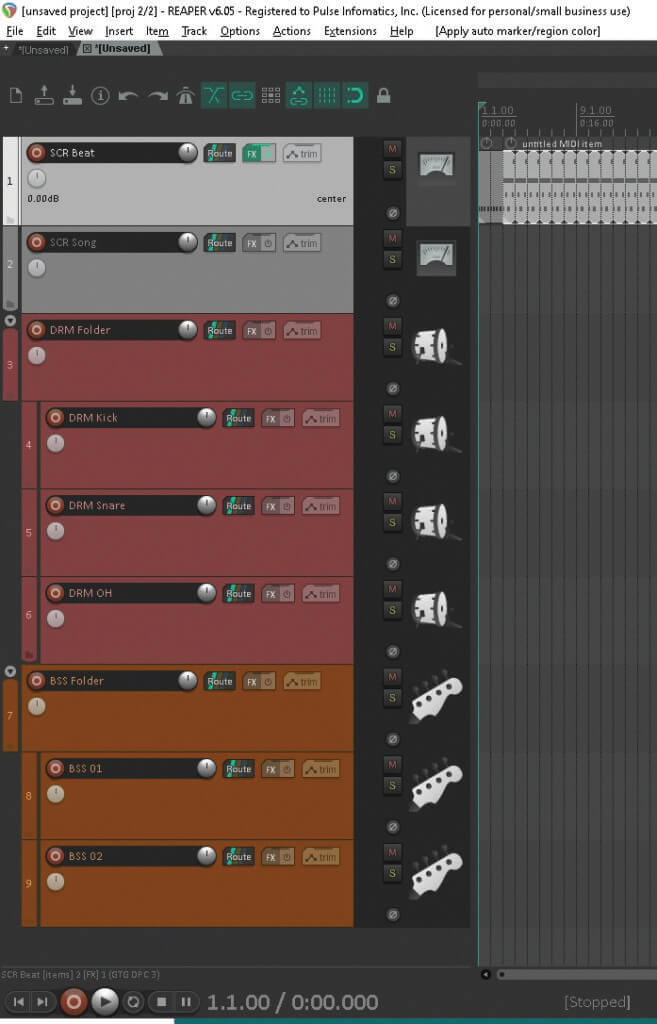
Note: I typically include at least once extra track for any given instrument in the event I want to try an entirely different take or approach to the instrument in question. In the above, I have two bass tracks, even if only one is used.
Using the above procedure, add folders and tracks for the following:
OTH Folder–> OTH Inst 01 –> Oth Inst 02
GTR Folder –> GTR 01 –> GTR 02
VXM Folder –> VXM 01 –> VXM 02
VXB Folder –> VXB Low –> VXB Mid –> VXB Hi
Of course, you do not need to add tracks or folders you believe you will never use. However, whatever tracks you believe you will need should follow some type of naming convention that is easy to replicate and provides some information about the items you will find in those tracks.
FX Track Buses
I also create an FX bus folder and include a track for compression, reverb, and delay. In the FX of those tracks I add the appropriate effect and I can then route any of the above tracks to those buses. You can also route an entire folder to a bus or apply FX to the folder track itself. This can be very helpful if you want to apply the same effect to every vocal track, for instance.
Save And Use Your Track Template
Once you have your tracks defined, select File->Project Templates->Save Project As Template.
Give your template a name like: 2020 full-band or 2020 basic acoustic.
Now you are ready to use the template. At any point you simple select:
File-Project Template and select your template from the list. If you’ve only saved one template, that is all you will see. You can have templates for different time signatures and with more or less complexity as needed for your music.
Once you select the template, you are presented with a complete set of tracks and whatever settings and FX’s you’ve stored with it.
My recording process summarized:
- Open Reaper and select my project template
- Set my beats per minute
- Arm my SCR Song track
- Set my input levels
- Record my song – both guitar and vocals in a single take. This is just a map. I am not that concerned about pitch and perfect performance. I try to ensure my timing is good so I can start recording my other parts.
- Disarm the SCR Song track
- Arm the first GTR track inside the GTR Folder
- Record multiple guitar takes (usually acoustic).
- Disarm first GTR track
- Arm first VXM track inside the VXM Folder
- Record multiple vocal takes
- Repeat for any instruments or vocals you are including in your project.
- Adjust FX and mix
- Render song
Final Notes
This process is primarily for a single songwriter adding tracks individually. However, if you are recording bands, track templates are extremely helpful in streamlining the setup process.
Also, you can always open your project template, make adjustments to it, and re-save it under the same name or a new name as appropriate.
ABOUT THE AUTHOR
Matthew Moran is a songwriter, performer, author, podcaster, and technologist based in Los Angeles. He performs solo shows and with his band, Arrogant Sage. He often provides workshops to business groups and musicians on content marketing, collaboration, and useful technologies. You can find out more at MatthewMoranOnline.com